A drop-down displays.
The Exchange Enabled Organizations page displays.
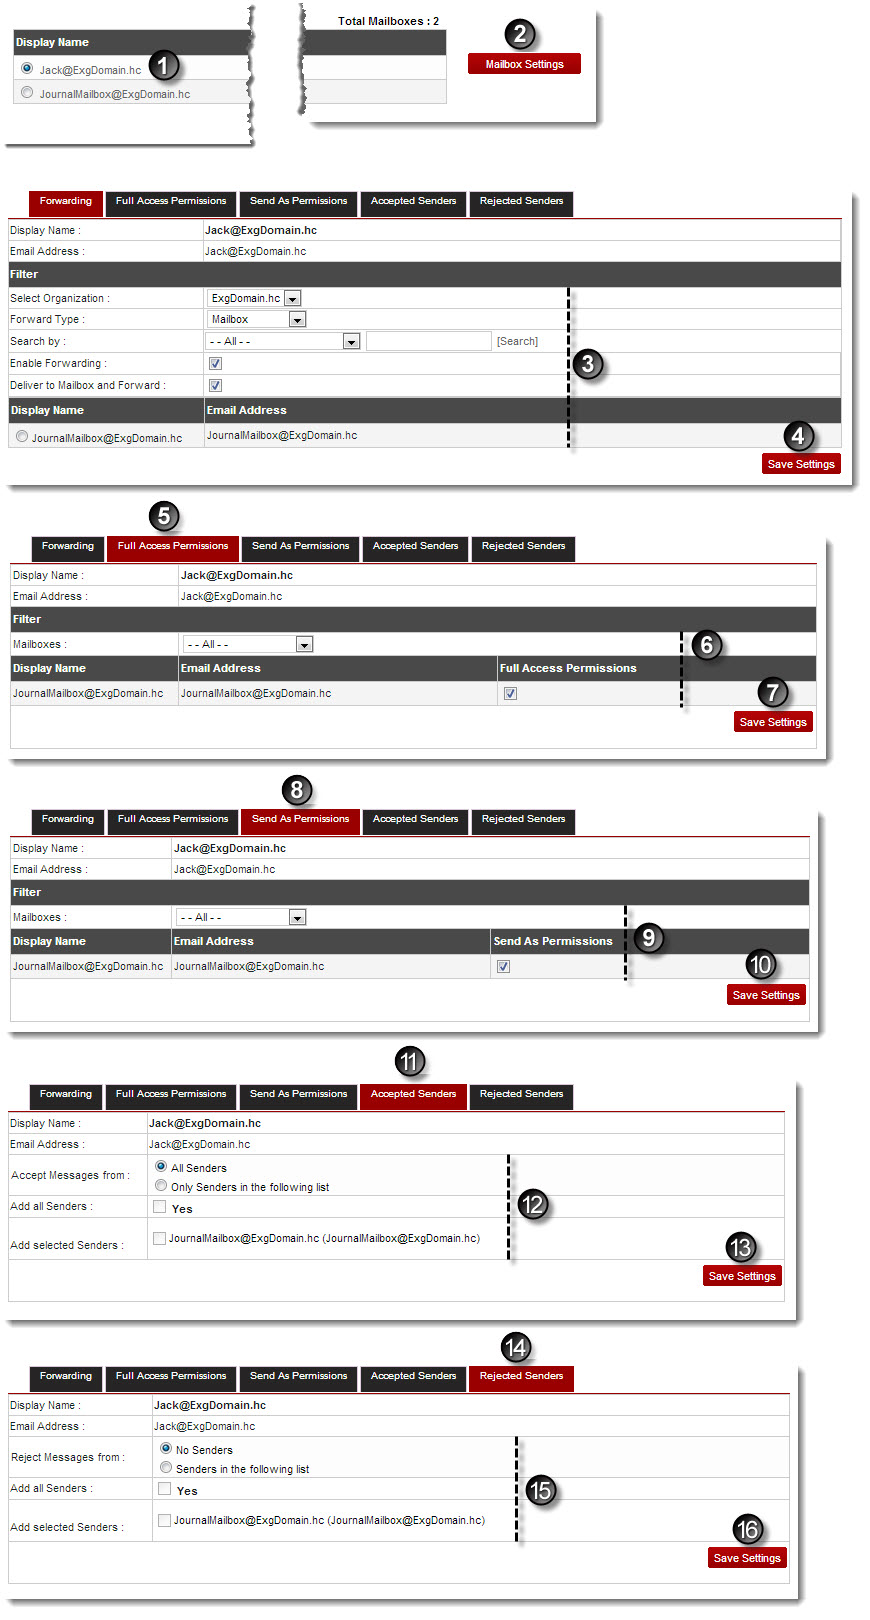
The Resource Mailboxes page displays.
The Set Forwarding page displays.
- Forward Type: Select the type of destination where you want to forward your mailbox items from the drop-down list box.
Available options for Forward Type are: 
Mailbox Distribution List Public Folder Contact - Search By: Select the type of search criteria from the drop-down list box.
Available options for Search By are: Display Name Email Address All - Enable Forwarding: Select the check box to allow forwarding on the selected mailbox.
- Deliver To Mailbox And Forward: Select the checkbox to first receive the mails in the selected mailbox and then forward it to the specified destination.
The Set Permissions page displays.
- Mailboxes: Select mailboxes from the drop-down list box.
Available options for Mailboxes are: With Access Granted All
The Accepted Senders page displays.
- Accept Messages from: Click All Senders to accept messages from everyone. Otherwise, click Only Senders in the following list.
- Add All Senders: Select the Yes check box to include all the senders.
- Add Selected Senders: Select check boxes of the senders to be added in the accepted senders list.
The Rejected Senders page displays.
- Reject Messages from: Click No Senders to reject messages from no one. Otherwise, click Senders in the following list.
- Add All Senders: Select the Yes check box to include all the senders.
- Add Selected Senders: Select check boxes of the senders to be added in the rejected senders list.
The Mailbox Permissions are configured.