A drop-down displays.
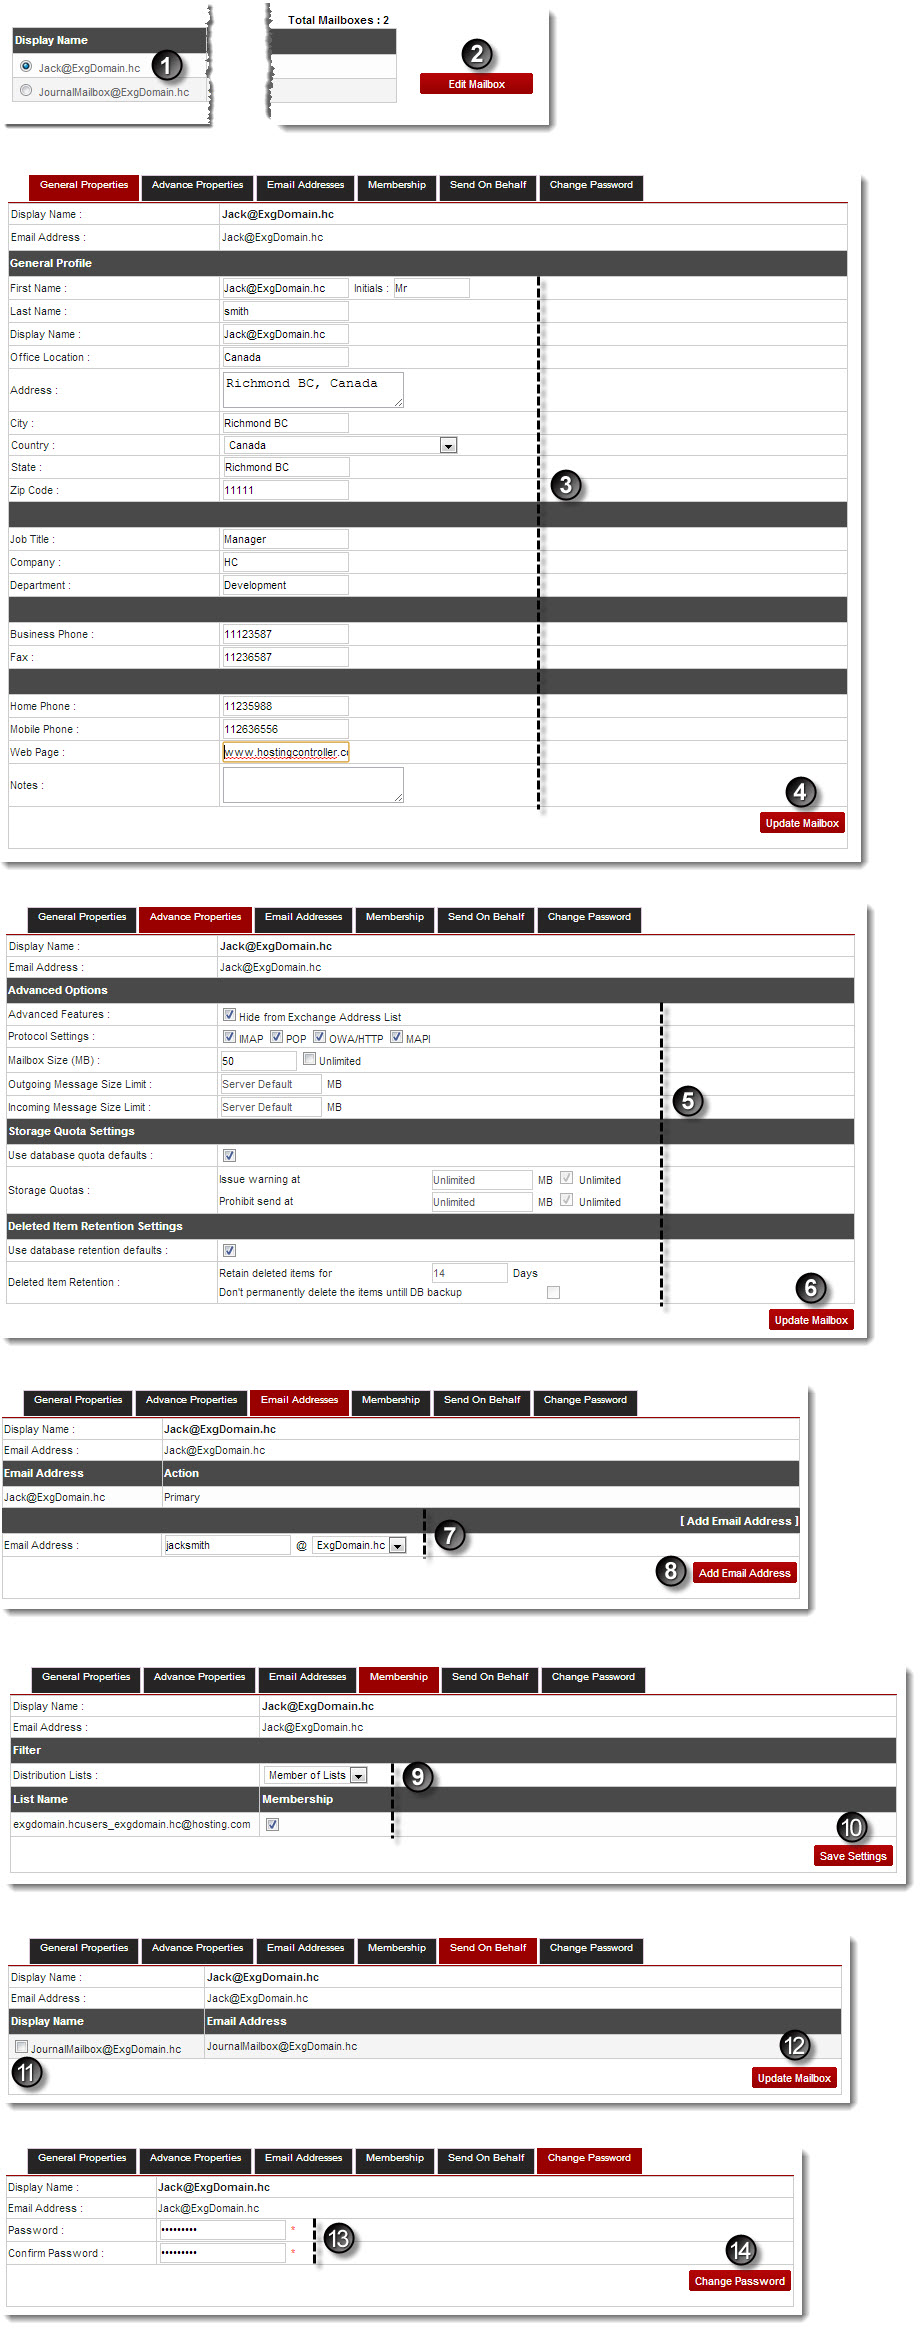
The Exchange Enabled Organizations page displays.
The Mailboxes page displays.
Edit General Properties page displays.
The Edit Advance Properties page displays.
- Advance Features: Click options as per requirements.

Hide From Exchange Address List: Select to conceal the mailbox (to be added) to appear in the Address Book. - Protocol Settings: Select none/any one or more/all of the protocols as required.
- Mailbox Size (MB): Type size of the mailbox to be added in MBs as required or select the Unlimited check box for indefinite size of the Mailbox.
- Outgoing Message Size Limit: Type maximum size limit for the outgoing messages.
- Incoming Message Size Limit: Type maximum size limit for the incoming messages.
- Use database quota defaults: Select to apply the default database quota settings to the selected mailbox.
- Storage Quotas: In case of not applying the default database quota settings, specify following information as required.
- Issue Warning at: Type the database quota limit that once exceeded, a warning should be send to user. Or select Unlimited checkbox for infinite database quota usage.
- Prohibit send at: Type the database quota limit that once exceeded, outgoing messages should not be sent. Or select Unlimited for infinite database quota usage.
- Use database retention defaults: Select the checkbox to apply the default database retention settings to the selected mailbox.
- Deleted Item Retention: In case of not applying the default database retention settings, specify following information as required.
- Retain deleted items for: Type number of days to retain the deleted items as required.
- Don’t permanently delete the items until DB backup: Select the checkbox to retain the deleted items till the database stores the backup files.
The Edit Email Addresses page displays.
The Email Address field displays.
The Edit Membership page displays.
The Edit Send on Behalf page displays.
The Change Password page displays.
The Password is changed.