A drop-down displays.
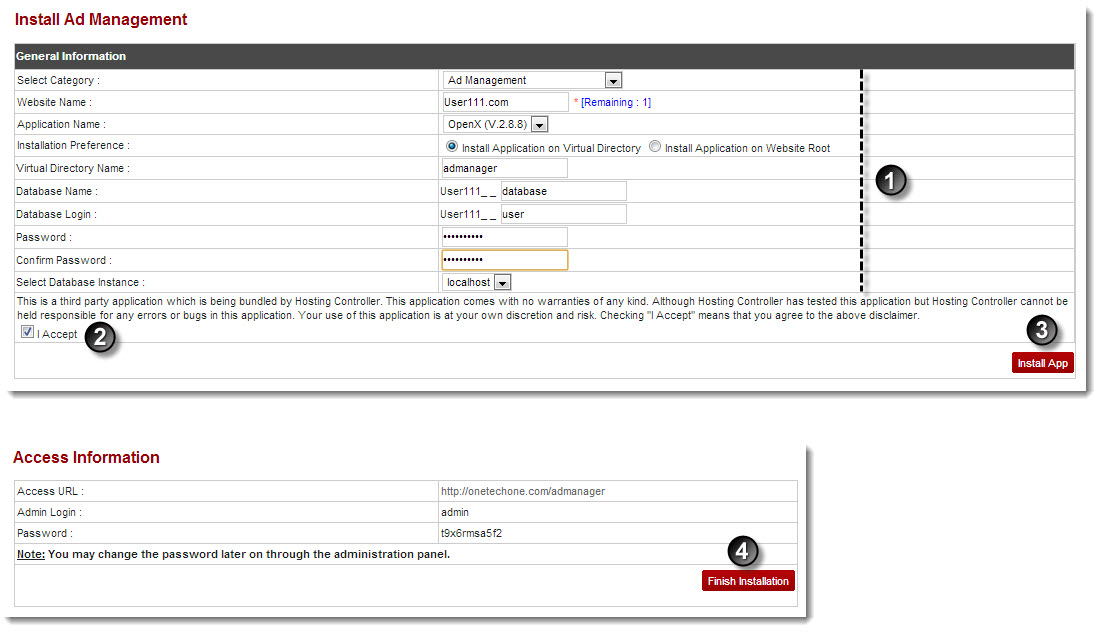
The Install "Application Name" page displays.
- Select Category: Select required category from the drop-down list box.
- Website Name: Select name of the website from the drop-down list box.
- Application Name: Select name of the application from the drop-down list box.
- Installation Preference: Select option as required.
- Virtual Directory Name: Type name of the directory.
- Database Name: Type name of the database.
- Database Login: Type login name of the database.
- Password: Type password.
- Confirm Password: Re-type password.
- Select Database Instance: Select instance of the database from the drop-down list box.
The Access Information page displays.
The selected application is installed.
 |
The screen shot shows installing Ad Management application. |