The Tools Options page is displayed.
The Mail Domains page is displayed.
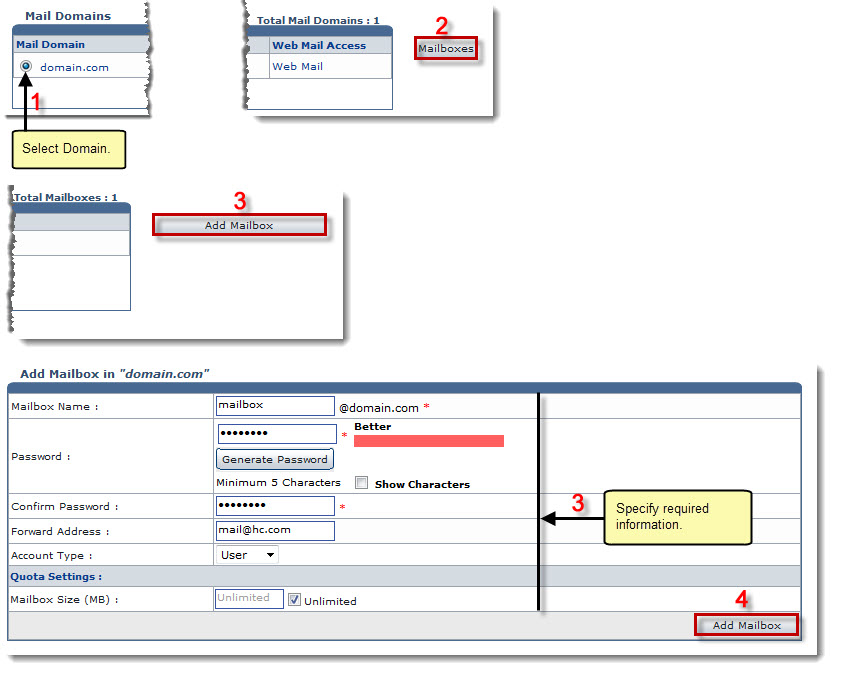
The Mailboxes page is displayed.
The Add Mailbox page is displayed.
- Mailbox Name: Type name of the mailbox.
- Password: Type password.

- Click Generate Password to automatically generate password.
- Click Show Characters check box to view password characters.
- Confirm Password: Re-type password.
- Forward Address: Type forward address.
- Account Type: Select the type of account.
Available options for Account Type are: 
Admin User
- Mailbox Size (MB): Type size of the mailbox. To define indefinite size for the maibox, select the Unlimited check box.
The mailbox is added.