Home > Reseller Manual > Toolbox > Tools > System Services > Shared SSL > Adding a Shared SSL
Adding a Shared SSL
To add a shared SSL:
- Log on to HC panel.
- From the left menu click Toolbox, and then Tools.
The Tools Options page is displayed.
- Under System Services section, click Shared SSL.
The Shared SSLs page is displayed.
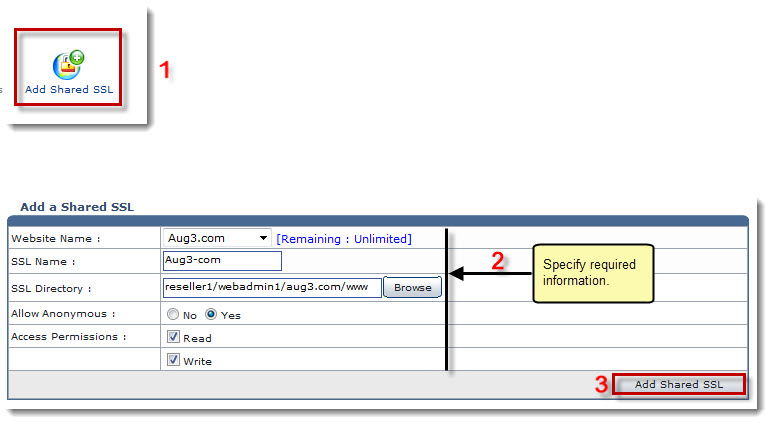
- Click Add Shared SSL.
The Add Shared SSL page is displayed.
- Specify following information:
- Website Name: Select name of the website from the drop-down list box.
- SSL Name: Type name of the SSL to be added.
- SSL Directory: Enter path for the SSL directory.
- Allow Anonymous: Click any of the option as Yes/No to give access to anonymous users to the SSL or not respectively.
- Access Permissions: Select permissions for the SSL to be accessed.
- Click Add Shared SSL.
The Shared SSL is added.

See also

