The My Server Options page is displayed.
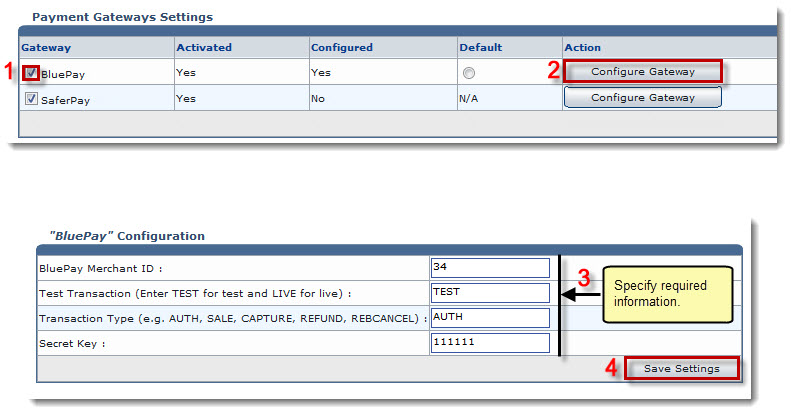
The Configure Payment Gateways page is displayed.
The Configure Gateway page is displayed.
- BluePay Merchant ID: Type ID of the merchant interface given by BluePay.
- Test Transaction (Enter TEST for test and LIVE for live): Type TEST to make a test transaction. Otherwise, type LIVE for real time transactions.
- Transaction Type (e.g. AUTH, SALE, CAPTURE, REFUND, REBCANCEL): Type transaction type.

AUTH: It hardly reserves the amount on a credit card for up to 10 days and does not actually take money off it. A separate capture transaction in order to be settled. 
SALE: It is both an Authorization and Capture transaction at once. It debits the card immediately if approved. 
CAPTURE: It is the process of settling amounts which are queued because of AUTH option. 
REFUND: It is simple charge back. 
REBCANCEL: This amount can also be charged against a credit card periodically e.g. monthly, after every 15 days. Now user can specify the no of time credit card is charged after first recharged and this REBCANCEL is used to stop recurring amount charge against a credit card. - Secret Key: Type secret key number.
The BluePay is configured.
