The My Server Options page is displayed.
The Configure Payment Gateways page is displayed.
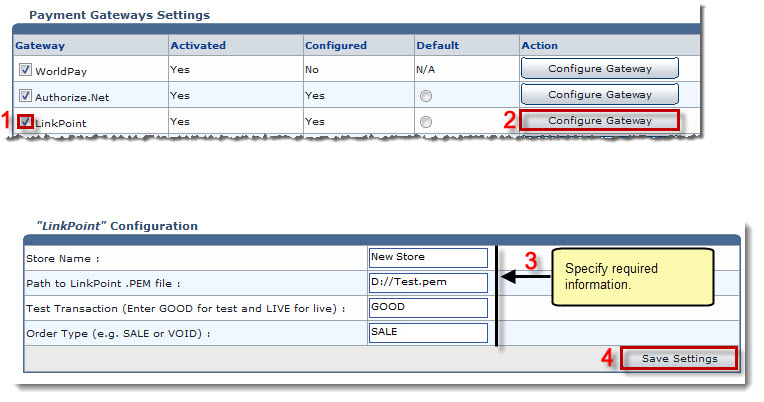
The Configure Gateway page is displayed.
- Store Name: Type name of the store.

It is usually a number that is given to you when you register for a LinkPoint account. - Path to LinkPoint .PEM File: Type path for the .PEM file.
It is path to the filename that your LinkPoint digital certificate is saved as. Your LinkPoint digital certificate must be saved as a text file, and should be named after your store name with the extension ".pem". For example: if your LinkPoint store name is "123456", your digital certificate name will be "123456.pem". 
It is recommended that .PEM file should be placed in the HC8 directory. - Test Transaction (Enter GOOD for Test and LIVE for live): If you are making a test transaction type GOOD. Otherwise, type LIVE for real time transactions.
- Order Type (e.g. SALE or VOID): Type order type.
SALE: It immediately charges a customer’s credit card. A Sale transaction can be made Recurring. VOID: It voids the transaction. Void transactions must be run manually in LinkPoint Central Reports.
The LinkPoint is configured.