A drop-down displays.
The Exchange Enabled Organizations page displays.
The Distribution Lists page displays.
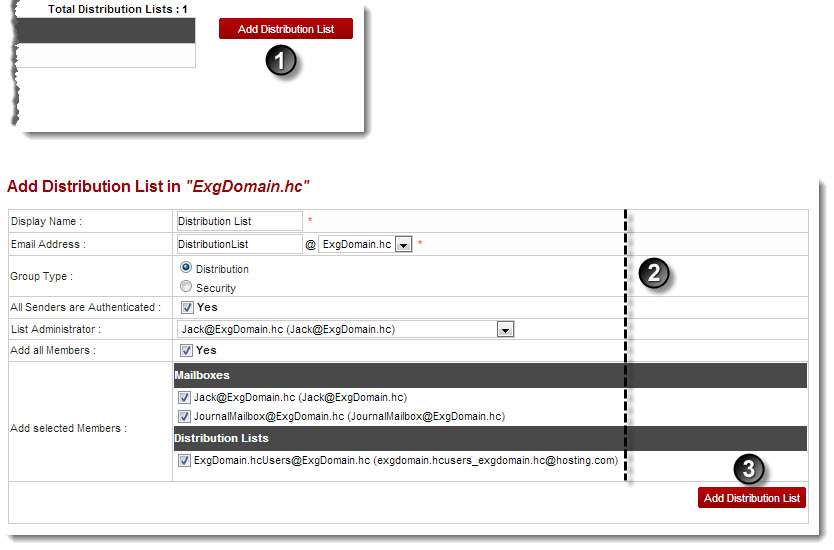
The Add Distribution List page displays.
- Display Name: Type name of the distribution list to be added.
- Email Address: Type email address.
- Group Type: Click type of the group of the distribution list.

There are two types of groups in Active Directory such as Distribution Groups and Security Groups. You can use distribution groups to create email distribution lists and security groups to assign permissions to shared resources. - All Sender are Authenticated: Click the Yes check box to specify all the senders as authenticated users.
- List Administrator: Select the administrator from the drop-down list box for the list.
- Add All Members: Select the Yes check box to add all the existing users as list members.
- Add Selected Members: Select check boxes as required to specify members of the list.
The Distribution List is added.
