A drop-down displays.
The Custom Menus page displays.
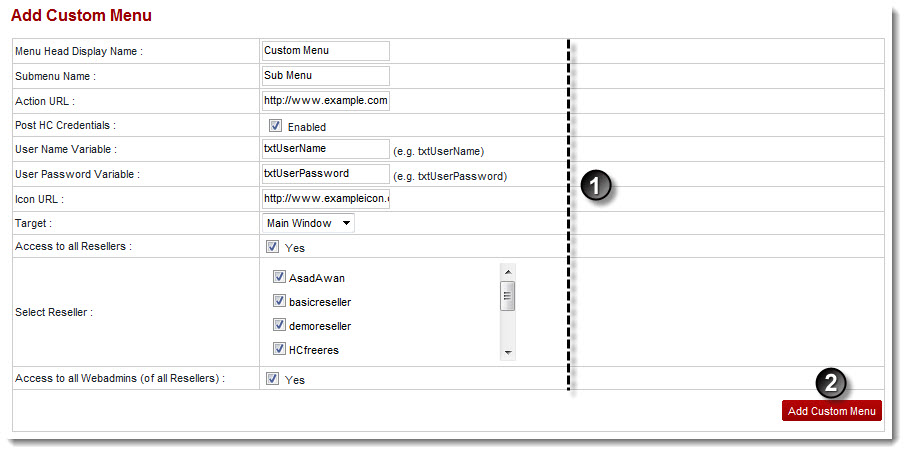
The Add Custom Menu page displays.
- Menu Head Display Name: Type name of the main heading/title on the left menu.
- Submenu Name: Type name for the sub tabs/menus to be added under the menu head.
- Action URL: Type the destination URL to be opened when the menu (being added) is selected.
- Post HC Credentials: Select the Enabled check box to allow Post HC Credentials.
- User Name Variable: Type variable for user name.
- User Password Variable: Type variable for user password.
- Icon URL: Type the icon path for the menu to be added.
- Target: Select window for the target URL.
Available options for Target are: 
Main Window
New Window - Access to all Resellers: Select the Yes check box to make this custom menu accessible to all resellers.
- Select Resellers Select the Resellers check box to give them access to the menu (being added).
- Access to all Webadmins (of all Resellers): Select the Yes check box to make this custom menu accessible to all webadmins.
The Custom Menu is added.