Home > Host Manual > Cluster Configuration > Manage Servers > Editing a Server > Windows Family > Editing a Windows Virtualization Server
Editing a Windows Virtualization Server
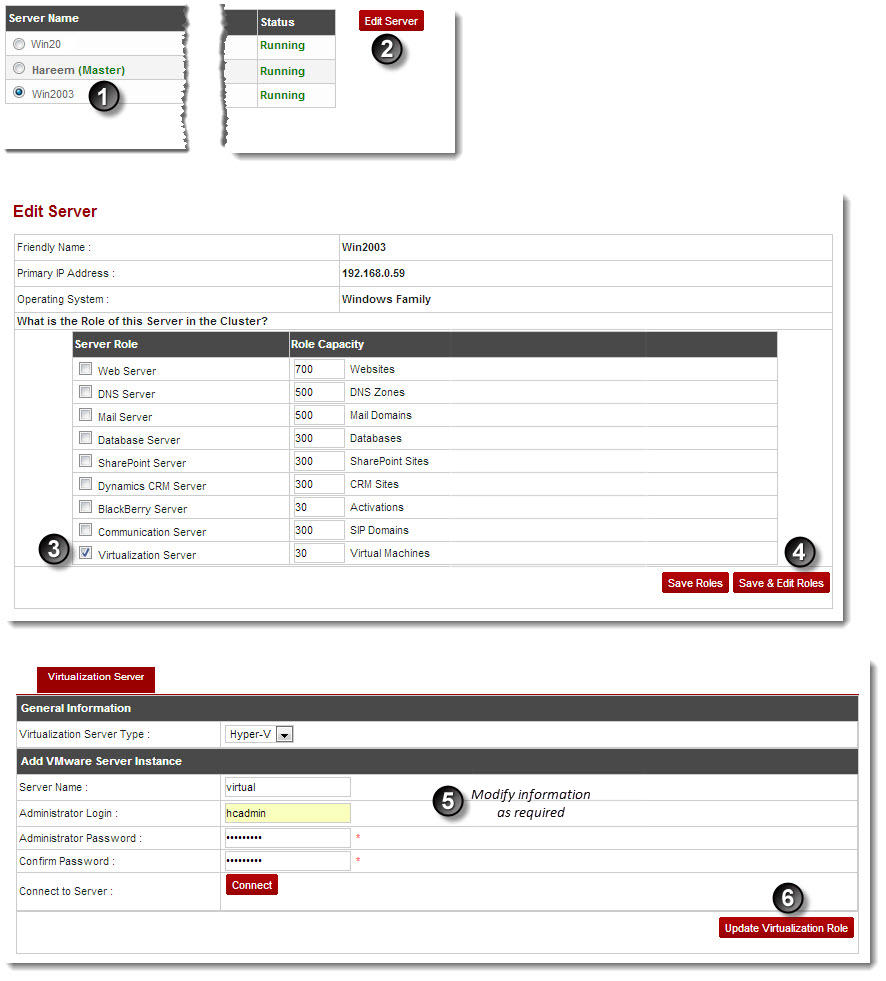
To edit a windows virtualization server:
- Log on to hc9 Panel.
- From the left menu click Cluster Configuration, and then Manage Servers.
A drop-down displays.
- Click My Servers.
The My Servers page displays with an Edit Server option on the right side of the page.
- Under Server Name column, select required server, and then click Edit Server.
The Edit Server page displays.
- Under Server Role column, click Virtualization Server, and then Save & Edit Roles.
The Virtualization Server page displays.
- Modify the information as required.
- Click Update Virtualization Role.
The Windows Virtualization Server is modified.
 |
- All settings depend on the configurations performed in the Global Settings section.
- Adding any server role before editing is only needed when the selected server is not added with the required role. In such scenario, you can add more role(s) for the server while editing.
|

See also


