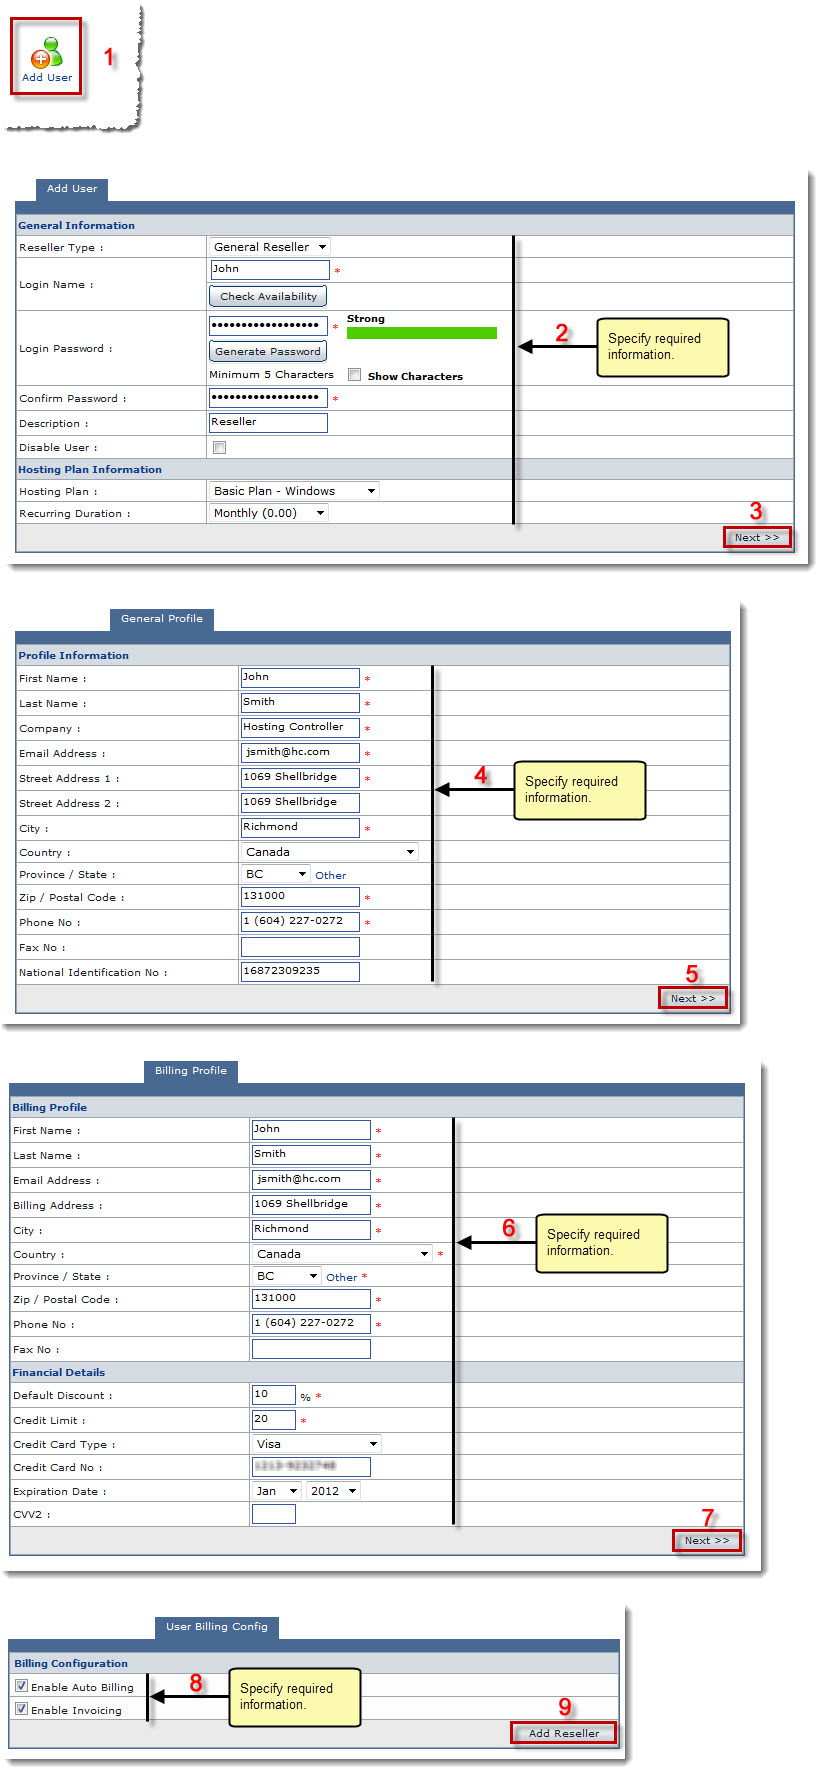
The User Manager page is displayed.
The Add User page is displayed.
- Reseller Type: Select type of the reseller from the drop-down list box.
- Login Name: Type login name of the user.

Click Check Availability to verify whether the name is available or not. - Login Password: Type password for the user.

- Click Generate Password to automatically generate password.
- Click Show Characters check box to view the actual characters of the password.
- Confirm Password: Re-type password.
- Description: Type brief description of the user to be added.
- Disable User: Select the checkbox to add a disabled user.
- Hosting Plan: Select plan for hosting from the drop-down list box.
- Recurring Duration: Select billing duration from the drop-down listbox.
Available options for the Recurring Duration are: 
Monthly 
Quarterly 
BiAnnual 
Yearly
The General Profile tab is displayed.
- First Name: Type first name of the user.
- Last Name: Type last name of the user.
- Company: Type company name of the user.
- Email Address: Type email address of the user.
- Street Address 1: Type primary postal address of the user.
- Street Address 2: Type secondary postal address of the user.
- City: Type city of the user.
- Country: Click the arrow and select the country of the user.
- Province/State: Type state or province of the user.
- Zip/Postal Code: Type zip or postal code of the user.
- Phone No: Type phone number of the user.
- Fax No: Type fax number of the user.
- National Identification No: Type National Identification Number of the user.
The Billing Profile tab is displayed.
- Default Discount: Type amount for the discount offered as default.
- Credit Limit: Type limit of the credit.
- Credit Card Type: Select type ofthe credit card from the drop-down list box.
- Credit Card No: Type number of the credit card.
- Expiration Date: Select the date of expiry from the drop-down list box.
- CVV2: Enter card verification value.
The User Billing Configuration tab is displayed.
- Enable Auto Billing: Select the check box to enable the automatic billing.
- Enable Invoicing: Select the check box to enable the invoicing.
