Home > Reseller Manual > Hosting Manager > Billing System > Advance Options > Configuring Payment Gateways > Configuring ChronoPay
Configuring ChronoPay
ChronoPay is one of the leading Payment Service Providers on the European market. ChronoPay meets the highest security standards as required by the major credit card organisations.
To configure chronopay:
- Log on to HC panel.
- From the left menu click Hosting Manager, and then Billing System.
The Billing System Options page is displayed.
- Under Advance Options, click Configure Billing.
The Configure Billing page is displayed.
- Select the Billing Enabled checkbox.
- Select the Enable Gateway checkbox and click Next.
A list of existing gateways is displayed.
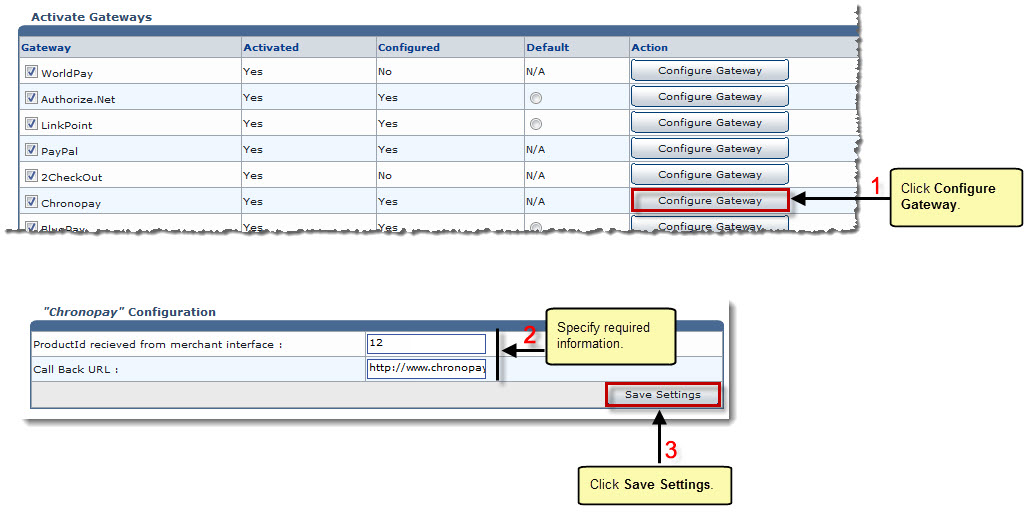
- Under Actions column, Click Configure Gateway against ChronoPay.
The Configure Gateway page is displayed.
- Specify the following information:
- ProductId Received from merchant interface: Type ID of the merchant interface given by ChronoPay.
- Call Back URL: Enter URL to call back.
- Click Save Settings.
Chronopay is configured.

See also

