Home > Reseller Manual > General > Domains > Properties > Website Properties > Domain Properties > Customizing Error Messages

Customizing Error Messages

To customize error messages:

  1. Log on to HC panel.
  2. From the left menu click General, and then Domains.
    My Websites page is displayed.
  3. Under column Website Name, click name of website, and then Properties.
    The Properties page is displayed.
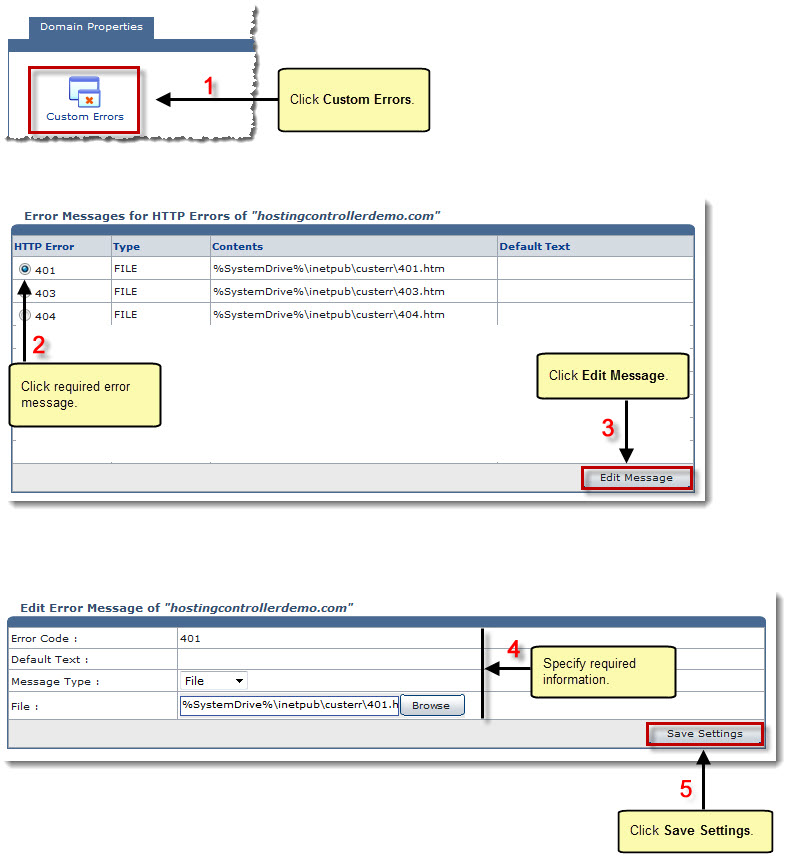
  4. Click to customize the error messages.
    The Error Messages page is displayed.
  5. Under column HTTP Error, select the required error to modify.
  6. Click Edit Message.
    The Edit Message page is displayed.
    Error Code is the standard error code given to an HTTP error, for example 400, 401.
    Default Text is displayed in case the respective error is encountered. This text can be modified as required to make it more descriptive, easy or customized.
  7. Click the Message Type arrow and select the type of message from the drop-down list box.
    Message Type can be in the form of a mapping to a File or to a URL. Either of these can be implemented as required.
  8. Click Browse to enter the path of content file.
    File is the location where the contents are located for the description of this error. For example C:\WINNT\help\iisHelp\common\400.htm.
  9. Click Save Settings.
    The Error Message is modified.

See also

Starting a Website
Stopping a Website
Redirecting a URL
Setting Permissions
Adding Host Headers
Adding Parked Domains
Managing Virtual Directories
Managing Private Folders
Managing Dedicated IPs
Recycling Application Pool