Home > Webadmin Manual > Hosting Services > Manage Exchange > Public Folders > Adding a Public Folder
Adding a Public Folder
To add a public folder:
- Log on to hc9 panel.
- From the left menu click Hosting Services, and then Manage Exchange.
A drop-down displays.
- Click Exchange Organizations.
The Exchange Enabled Organizations page displays.
- Under Organization Name column, select organization and click Public Folders.
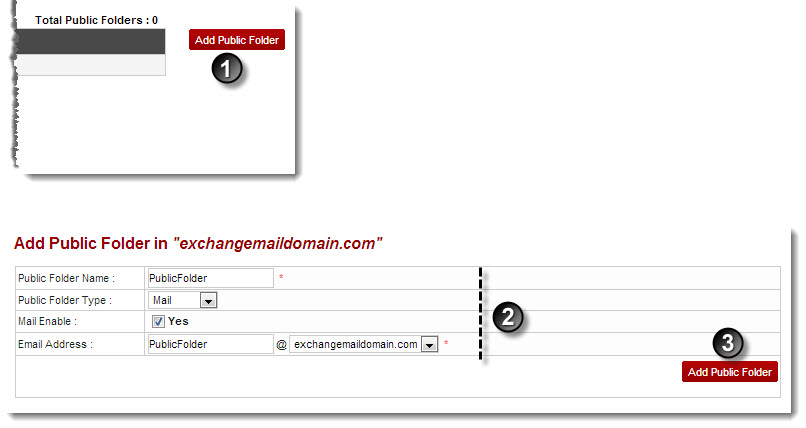
The Public Folders page displays.
- Click Add Public Folder.
The Add Public Folder page displays.
- Specify following information:
- Public Folder Name: Type name of the folder to be added.
- Public Folder Type: Select type of the public folder.
- Mail Enable: Select the Yes check box to enable emails for the folder being added.
- Email Address: Type email address of the folder.
- Click Add Public Folder.
The Folder is added.
See also