Home > Host Manual > Billing System > Manage Billing > Configuring Payment Gateways
Configuring Payment Gateways
 |
To configure a Payment Gateway, you must Activate the required Payment Gateway(s). For further information refer to Activating Gateways . |
To configure payment gateways:
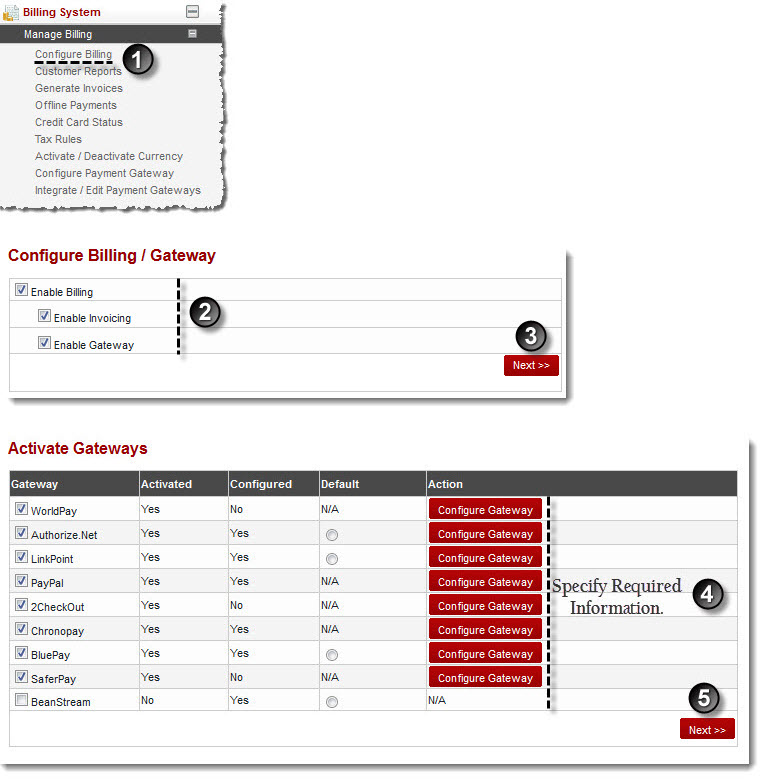
- Log on to hc9 panel.
- From the left menu click Billing System then Manage Billing.
A drop-down displays.
- Click Configure Billing.
The Configure Billing page displays.
- Select the Billing Enabled check box.
- Select the Enable Gateway check box.
- Click Next.
The Activate Gateways page displays.
- Under Gateway column, select the check boxes and then click Configure Gateway.
The selected gateway's configurations page displays.
- Specify required information and click Save Settings.
The selected gateway is configured.
| |
The Configure Billing section allows you to configure the supported Payment Gateways. |


