Home > Reseller Manual > Hosting Services > Manage Websites > Properties > Domain Properties > Managing Private Folders
Managing Private Folders

|
Managing Private Folders includes:
- Viewing Private Folders
- Adding Private Folders
- Editing Private Folders
- Deleting Private Folders
|
To view private folders:
- Log on to hc9 panel.
- From the left menu click Hosting Services, and then Manage Websites.
A drop-down displays.
- Click My Websites.
My Websites page displays.
- Under Website Name column, select website then click Properties.
The Website Properties page displays.
- Click Private Folders.
The Private Folders page displays.

To add a private folder:
- Log on to hc9 panel.
- From the left menu click Hosting Services, and then Manage Websites.
A drop-down displays.
- Click My Websites.
My Websites page displays.
- Under Website Name column, select website then Properties.
The Website Properties page displays.
- Click Private Folders.
The Private Folders page displays.
- Under Private Folder column, select folder then click Add Private Folder.
The Add Private Folder page displays.
- Specify the following information:
- Website Name: Select website from the drop-down list box.
- Folder Path: Enter the path of the private folder.
- User Name: Type name of the user.
- User Password: Type password of the user.
- Confirm Password: Re-type password.
- Click Add Private Folder.
The Private Folder is added.

To edit a private folder:
- Log on to hc9 panel.
- From the left menu click Hosting Services, and then Manage Websites.
A drop-down displays.
- Click My Websites.
My Websites page displays.
- Under Website Name column, select website then Properties.
The Website Properties page displays.
- Click Private Folders.
The Private Folders page displays.
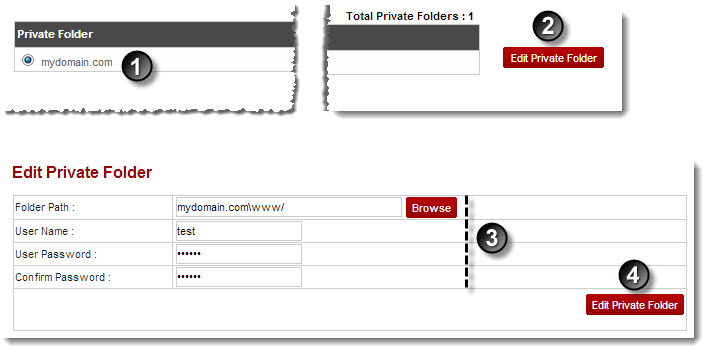
- Under Private Folder column, select folder then click Edit Private Folder.
The Edit Private Folder page displays.
- Modify information as required and click Edit Private Folder.
The Private Folder is modified.

To delete a private folder:
- Log on to hc9 panel.
- From the left menu click Hosting Services, and then Manage Websites.
A drop-down displays.
- Click My Websites.
My Websites page displays.
- Under Website Name column, select website then Properties.
The Website Properties page displays.
- Click Private Folders.
The Private Folders page displays.
- Under Private Folder column, select folder then click Delete.
A dialogue box displays.
- Click OK.
The Private Folder is deleted.

See also


