Home > Host Manual > Panel Configuration > Migration > Transferring Virtual Machine
Transferring Virtual Machine

|
The process relates to the transfer of Virtual Machines between Hosting Controller users. |
To transfer virtual machine(s):
- Log on to hc9 panel.
- From the left menu click Panel Configuration, and then Migration.
A drop-down displays.
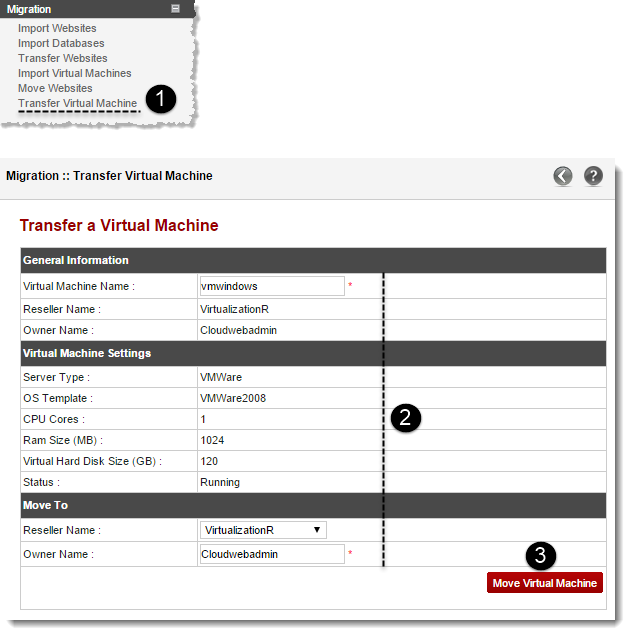
- Click Transfer Virtual Machine.
The Transfer Virtual Machines page displays.
- Specify General Information:
- Virtual Machine Name: Type name of the virtual machine to be transferred.

|
Reseller Name shows name of the reseller under which the VM resides. |
|
Owner Name shows name of the Tenant Admin (End User) under which the VM resides. |
|
Virtual Machine Settings show details of the virtual machine. |
- Specify Move To:
- Reseller Name: Select name of the reseller from the drop-down list box to which the VM has to be moved.
- Owner Name: Type name of the Tenant Admin (End User) to which the VM has to be moved.
- Click Move Virtual Machine.
The Virtual Machine is moved.
See also