Home > Host Manual > System > My Server > System Settings > Managing NAT Manager
Managing NAT Manager
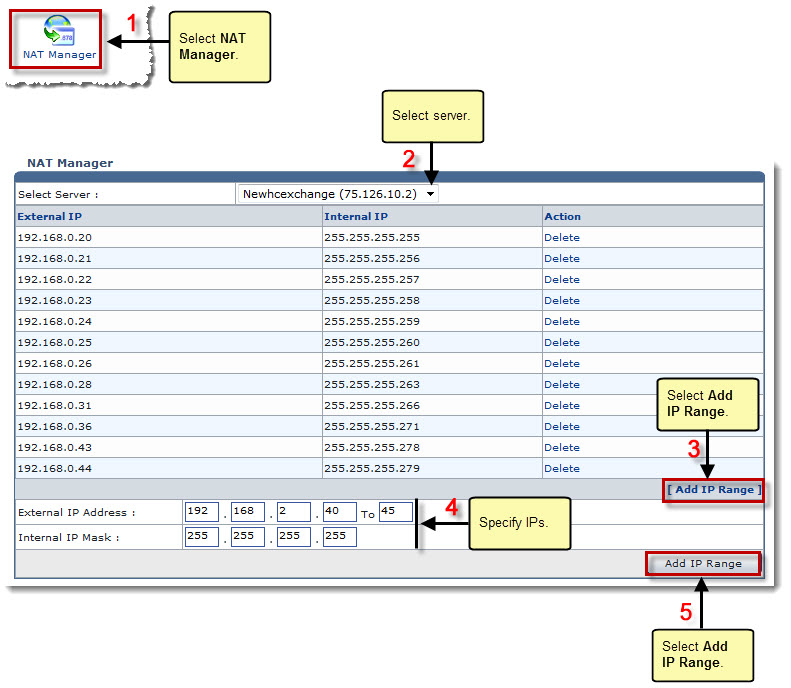
To manage NAT manager:
- Log on to HC panel.
- From the left menu click System, and then My Server.
The My Server Options page is displayed.
- Under System Settings section, click NAT Manager.
The NAT Manager page is displayed.
- Under NAT Manager, click the Select Server arrow and select server from the drop-down list box.
The IP range for the selected server is displayed.
| The following information is displayed: |
 |
External IP: It shows the external IP range for the selected server. |
 |
Internal IP: It shows the internal IP range for the selected server. |
 |
Action: It allows you to remove the respective IP range. Click Delete to remove the IP range. |
 |
The NAT (Network Address Translator/Translation) takes a computer’s internal IP and converts it to the external IP when the data is sent to the internet. Also, when data is received from the internet for computer, it replaces the external IP to the internal IP so that it can be routed to the correct computer. |
 |
To add an IP range:
- Click Add IP Range.
The add options are displayed.
- Type External IP Address range i.e. starting and ending IP addresses.
- Type Internal IP Mask.
- Click Add IP Range.
The specified IP range is added.
|

See also


