Home > Host Manual > Panel Configuration > Customer Settings > Configuring Load Balancer Settings
Configuring Load Balancer Settings
To configure load balancer settings:
- Log on to hc9 panel.
- From the left menu click Panel Configuration, and then Customer Settings.
A drop-down displays.
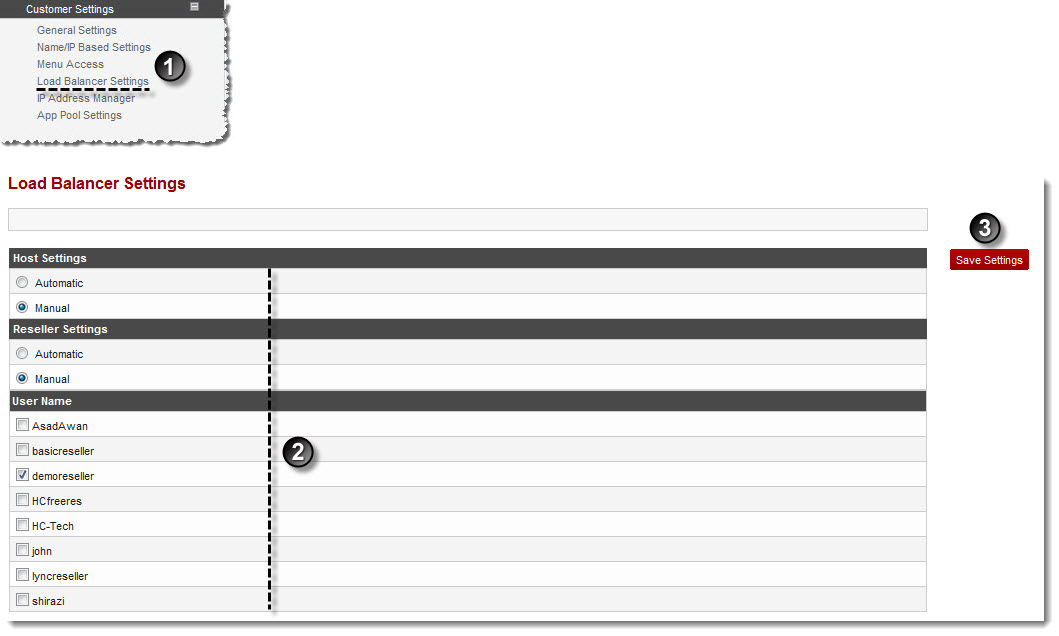
- Click Load Balancer Settings.
The Load Balancer Settings page displays.
- Under Host Settings, select the required settings.
- Under Reseller Settings, select the required settings.
- Click Save Settings.
The Load Balancer Settings are configured.
 |
The Load Balancer settings are configurable at Host level and Reseller level. By default these are set on Automatic.
- Automatic: If this option is selected, HC distributes load evenly across two or more servers in order to get optimal resource utilization, maximize throughput, minimize response time, and avoid overload. Load balancing decision is made by HC on the basis of quantity. New resources (i-e. website/mail/DB/DNS) are created on the server having less number of existing resources compare to other servers within cluster. HC Load Balancer works as Round Robin Load Balancing, only if all users are set on Automatic Load Balancer.
-
Manual: If this mode is selected, while adding any website, mail domain, database, SharePoint Site, OCS Site or Dynamics CRM Site, it shows a combo box having all the servers with their respective roles. This combo box allows server selection where Domain/DNS/Mail/Database to be created.
|
See also