Home > Host Manual > Panel Configuration > Customer Settings > Managing IP Addresses
Managing IP Addresses
To manage IP addresses:
- Log on to hc9 panel.
- From the left menu click Panel Configuration, and then Customer Settings.
A drop-down displays.
- Click IP Address Manager.
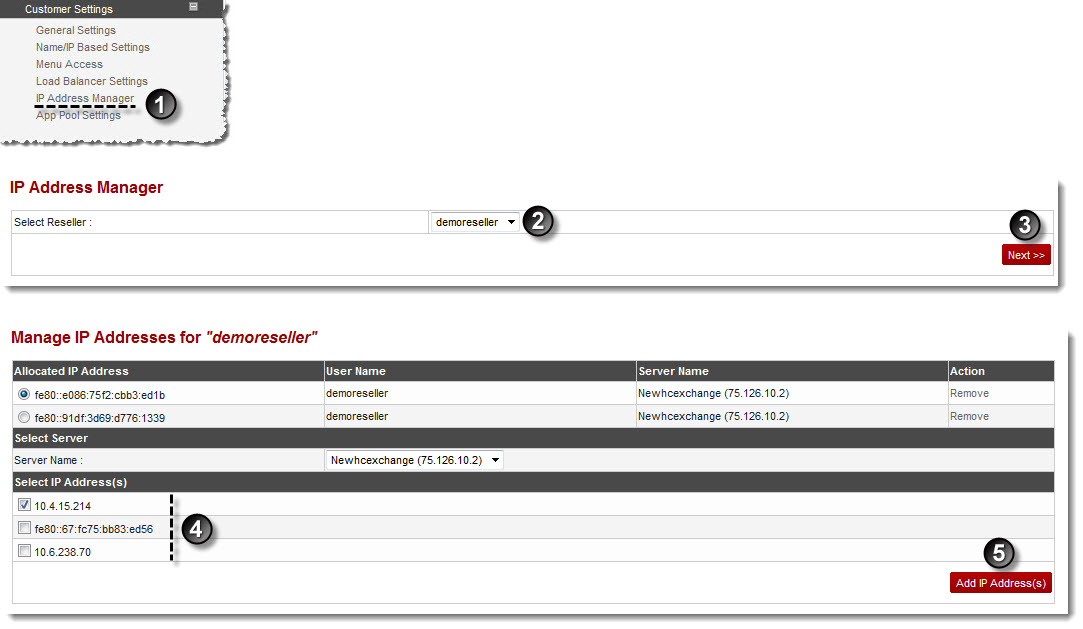
The IP Address Manager page displays.
- Click the Select Reseller arrow and select the reseller from the drop-down list box.
- Click Next.
The IP Address Manager page is displayed.
| Following information is displayed: |

|
Allocated IP Address: It is the assigned IP address of the selected reseller. |
|
User Name: It is name of the reseller. |
|
Server Name: It is name of the reseller's server. |
|
Action: It is the allowed action. To delete the IP address, click Remove. |
- Under Select Server click the Server Name arrow and select server for the selected reseller.
- Under Select IP Address(s), select the required address check boxes and click Add IP Address(s).
The IP address is allocated to the selected reseller.
See also