A drop-down displays.
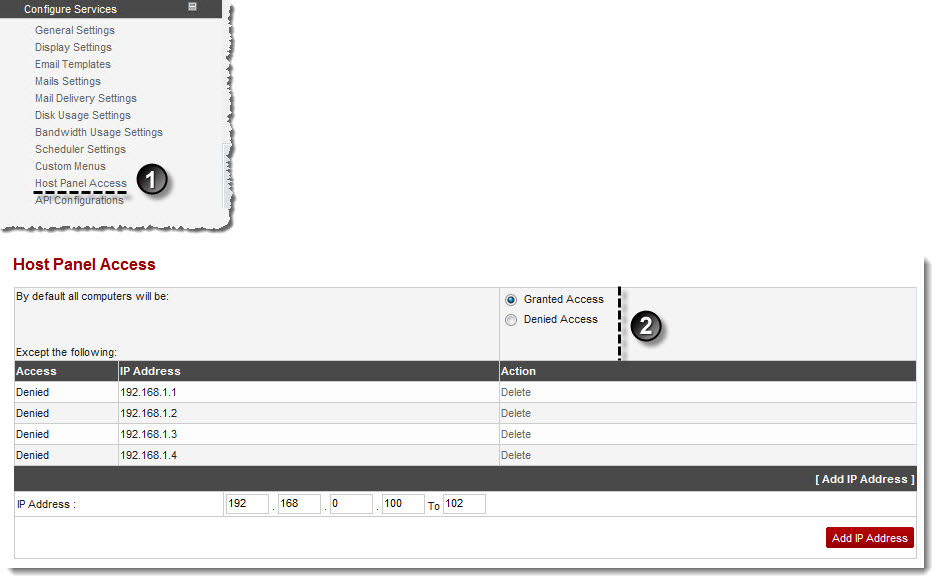
The Host Panel Access page displays.
- By default all computers will be: Click Granted Access or Denied Access to allow or deny access respectively to all the computers.
Except the Following grid, shows the following information: 
Access: It shows whether the access is granted or denied. If Granted Access is clicked in the previous field then access for the defined IP range is denied and vice-versa. IP Address: It shows the IP address for which access is granted/denied. Action: It allows you to remove the IP address from the exceptional list. Click Delete to remove the respective IP.

To add an IP range for the exceptional list: - Click Add IP Address.
An option is displayed. - Type starting and ending range of an IP address.
- Click Add IP Address.
The exceptional list is defined.
- Click Add IP Address.