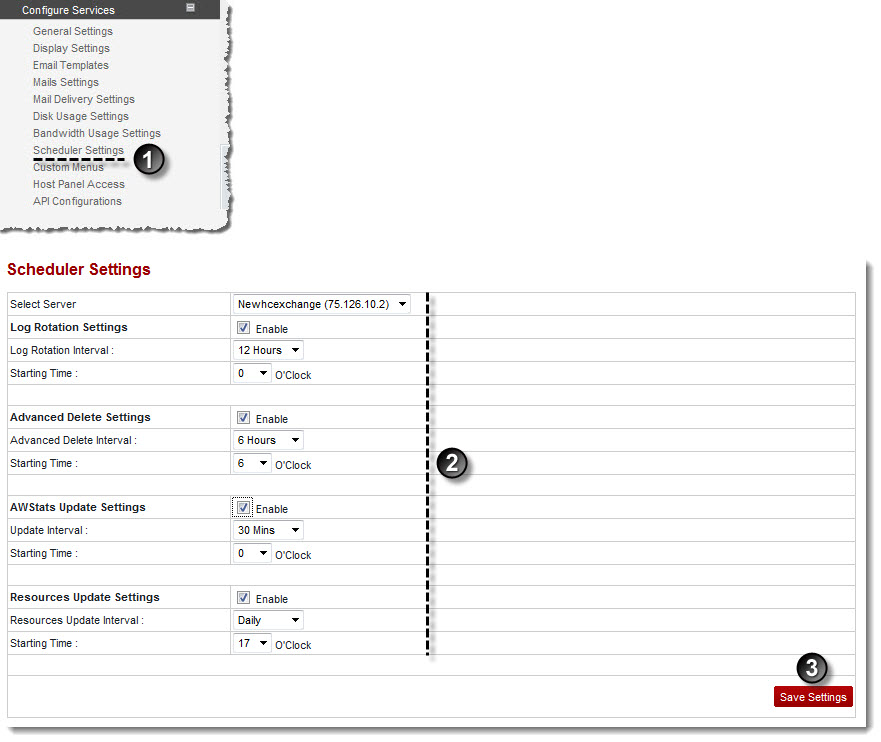
A drop-down displays.
The Scheduler Settings page displays.
- Log Rotation Interval: Select time interval from the drop-down list box after which logs are rotated.

The logs files that are kept on your server get heavy with the time. The solution is to rotate the log files. The logs are rotated after the specified time interval. - Starting Time: Select time from the drop-down list box, when log rotation should start.
- Advance Delete Interval: Select time interval from the drop-down list box after which records are deleted.

It is not the time interval for the advanced deletion, rather it is the time for the advance delete service. The time given to the user will still be 24 hours to confirm and only confirmed accounts are placed in queue. - Starting Time: Select time from the drop-down list box, when delete process should start.
- Update Interval: Select time interval from the drop-down list box after AWstats are updated.
- Starting Time: Select time from the drop-down list box, when AWstats update process should start.

|
Certain resources that are updated by the panel, require to be updated from the back end as well. Therefore, these settings are required. |
- Resources Update Interval: Select time interval from the drop-down list box after which resources are updated.
- Starting Time: Select time from the drop-down list box, when resource update process should start.
- Migration Interval: Select time interval from the drop-down list box after which records are migrated.
- Starting Time: Select time from the drop-down list box, when migrate process should start.
The Scheduler Settings are configured.
