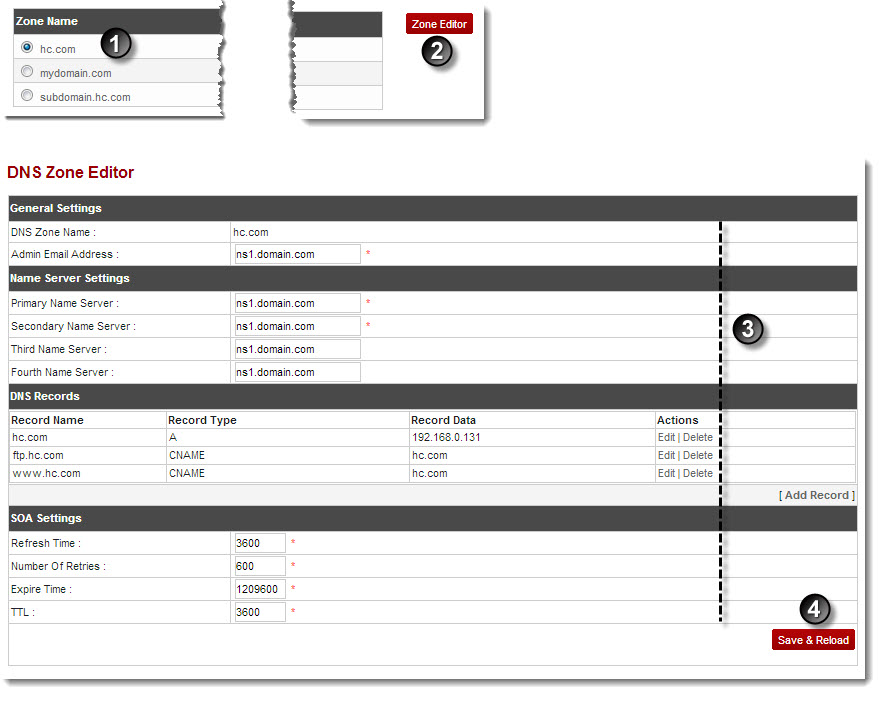
A drop-down displays.
The Zone Editor page displays.
- Admin Email Address: Type email address of the zone administrator.
- Primary Name Server: Type name of the primary server.
- Secondary Name Server: Type name of the secondary server.
- Third Name Server: Type name of the third server.
- Fourth Name Server: Type name of the fourth server.
- Refresh Time: Modify the refresh time for the zone.
- Number of Retries: Modify number of retries for the zone.
- Expire Time: Modify the expiry time for the zone.
- TTL: Modify the Time-To-Live (TTL) time period of the zone.

To add a new DNS record, click Add Record and specify following information: - Record Name: Specify name of the record.
- Record Type: Specify type of the record.
- Record Data: Specify data of the record.
The Zone Editor is configured.
