Home > Webadmin Manual > Hosting Services > Manage DNS > Editing a DNS Zone
Editing a DNS Zone
To edit a DNS zone:
- Log on to hc9 panel.
- From the left menu click Hosting Services, and then Manage DNS.
A drop-down displays.
- Under Zone Name column, select zone and click Edit Zone.
- Modify information as required and then click Save & Reload.
The DNS Zone is modified.
|
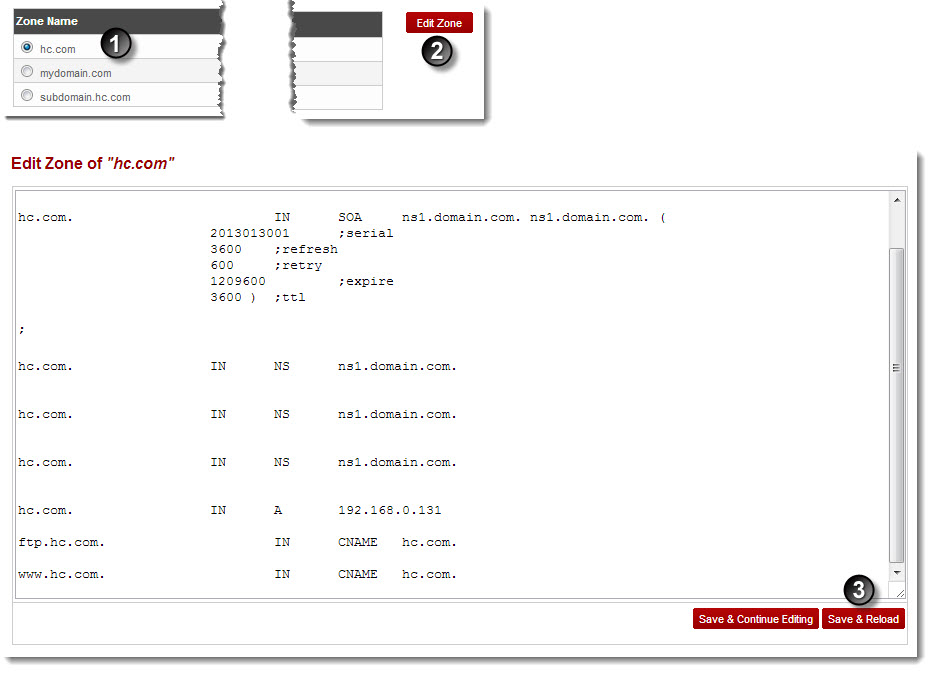
To continue editing, click Save & Continue Editing.
|
See also