A drop-down displays.
My Websites page displays.
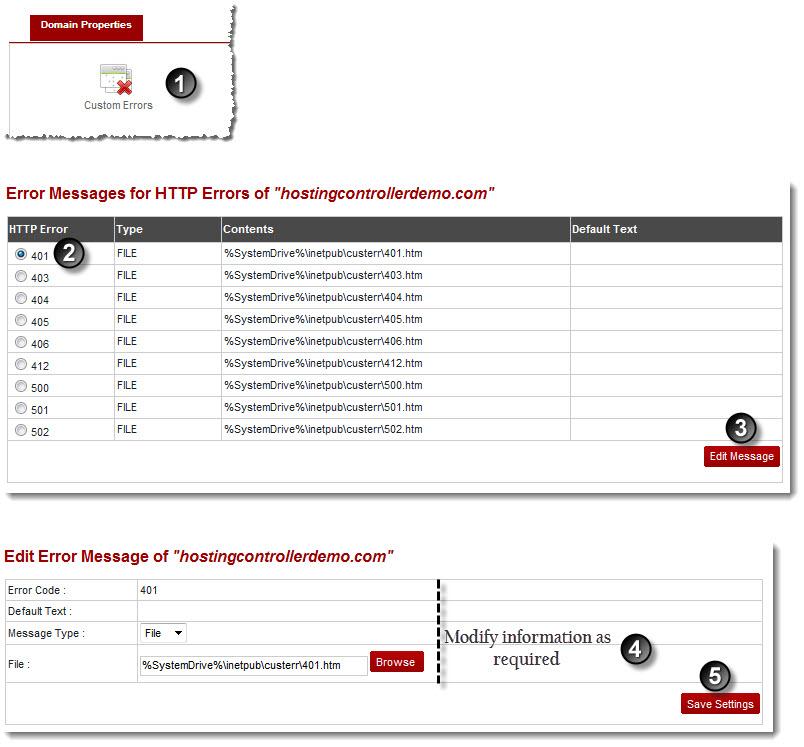
The Website Properties page displays.
The Error Messages page displays
The Edit Message page displays.
 |
Error Code is the standard error code given to an HTTP error, for example 400, 401. |
 |
Default Text is displayed in case the respective error is encountered. This text can be modified as required to make it more descriptive, easy or customized. |
 |
Message Type can be in the form of a mapping to a File or to a URL. Either of these can be implemented as required. |
|
File is the location where the contents are located for the description of this error. For example C:\WINNT\help\iisHelp\common\400.htm. |
The Error Message is modified.