A drop-down displays.
My Websites page displays.
The Website Properties page displays.
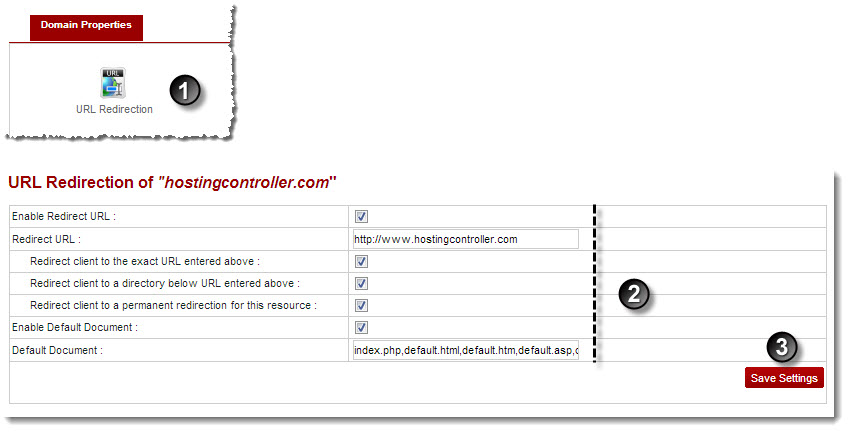
The URL Redirection page displays
- Redirect client to the exact URL entered above: Select the check box to redirect the selected website to the above URL only.
- Redirect client to a directory below URL entered above: Select the check box to redirect the selected website to one directory below the specified URL.
- Redirect client to a permanent redirection for this resource: Select the check box to redirect the selected website to the above URL permanently.
 |
A default document tells the web server how to behave when it receives a request for site that does not mention a specific page. For example, when a web server receives a request for http://mydomain.com, its display can be automatically set to a document titled as default.htm, followed in order by default.asp, default.html etc., or any other name or type of file as required. |
The URL Redirection is enabled.