Home > Host Manual > Hosting Services > Manage Websites > Properties > Domain Properties > Managing Dedicated IPs
Managing Dedicated IPs
 |
When IP is assigned, it is automatically changed in the Web Server, DNS Server, Mail Server as well as in the HC database. |
To assign/change dedicated IP:
- Log on to hc9 panel.
- From the left menu click Hosting Services, and then Manage Websites.
A drop-down displays.
- Click My Websites.
My Websites page displays.
- Under Website Name column, select website then click Properties.
The Website Properties page displays.
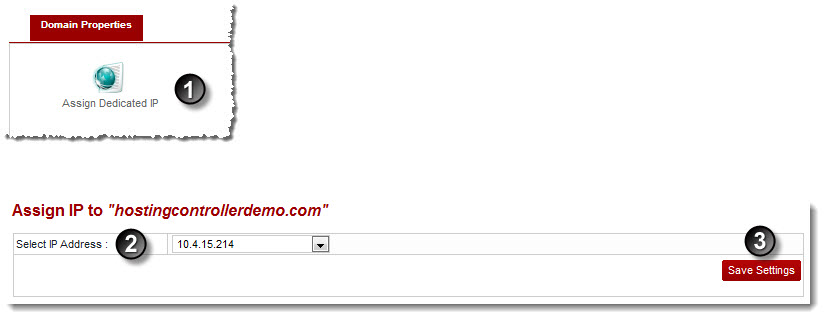
- Click Assign Dedicated IP to assign/change dedicated IP address of the selected website.
The Assign Dedicated IP page displays.
- Select IP Address from the drop-down list box.
- Click Save Settings.
The selected IP is assigned.

See also


