Home > Host Manual > Cluster Configuration > Manage Servers > Adding a Server > Windows Family > Adding a Windows DCRM Server
Adding a Windows DCRM Server
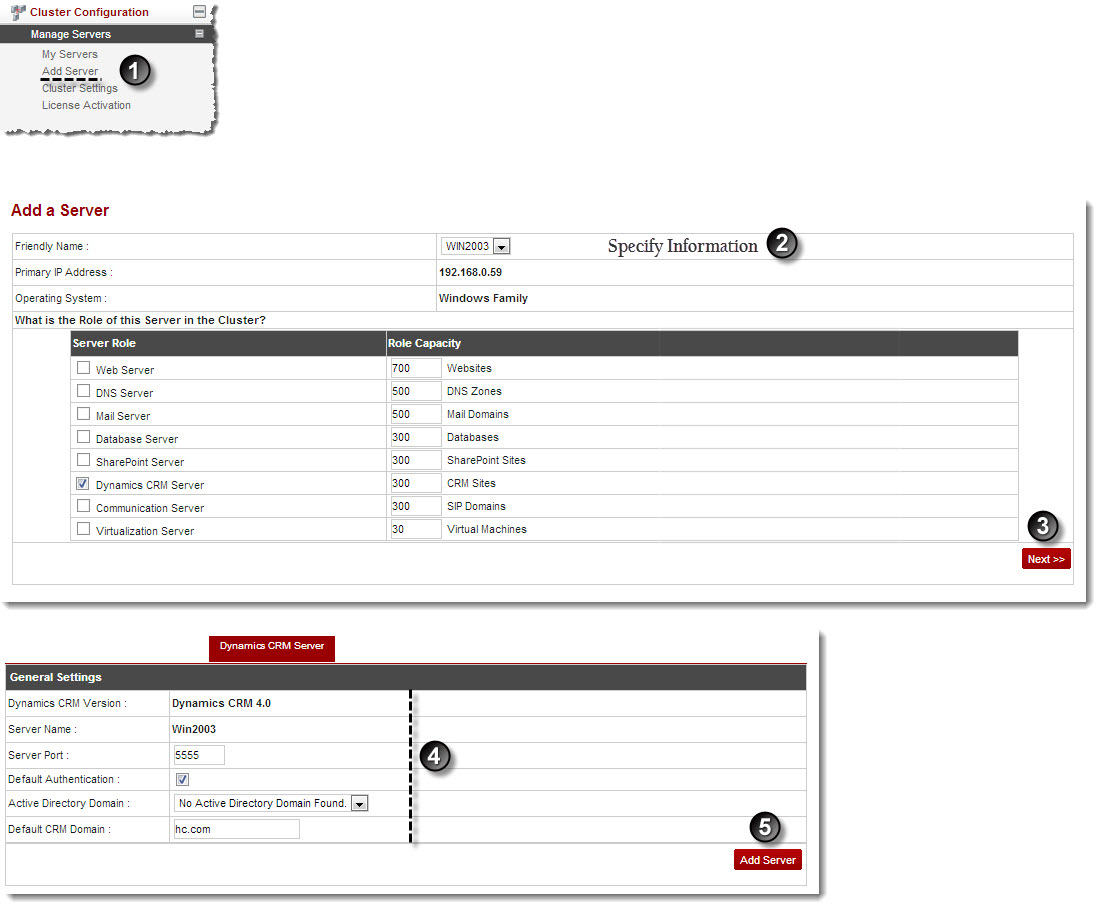
To add a windows dynamics CRM server:
- Log on to hc9 panel.
- From the left menu click Cluster Configuration, and then Manage Servers.
A drop-down menu displays.
- Click Add Server.
The Add Server page displays.
- Click the Friendly Name arrow and select the required server from the drop-down list box.

|
The Primary IP Address shows the IP address of the server to be added.
|
 |
The Operating System shows the platform (Windows/Linux) of the server to be added.
|
- Under Server Role column, select the Dynamics CRM Server check box.

|
Every server can have one or more role(s) in the cluster. These roles need to be set every time a new server is added to the cluster.
|
- Under Role Capacity column, type the number of CRM Sites supported by the server.
- Click Next.
The Dynamics CRM Server Configurations page is displayed.
- Specify the General Settings:
 |
The Dynamics CRM Version shows the version of the CRM.
|
 |
The Server Name shows the name of the server, where Dynamics CRM and HC are installed.
|
- Server Port: Type port for the DCRM server.
 |
It is defined while installing Dynamics CRM Server. Usually it is 5555 as suggested by the CRM Installer.
|
- Credential User Name: Type user name.
 |
This user can access the CRM server. It should be an Active Directory User and Dynamics CRM Deployment Administrator.
|
- Credential Password: Type password.
- Confirm Password: Re-type password.
- Active Directory Domain: Click the arrow and select domain for Active Directory from the drop-down list box.
- Default CRM Domain: Type domain for the default CRM.
 |
It is the IFD (Internet Facing Deployment) domain. It is used in IFD URL for each Dynamics CRM Site.
|
- Click Add Server.
A Windows Dynamics CRM Server is added.

See also


