Home > Host Manual > Hosting Manager > Billing System > Enabling Gateways
Enabling Gateways
To enable a gateway:
- Log on to HC panel.
- From the left menu click Hosting Manager, and then Billing System.
The Billing System Options page is displayed.
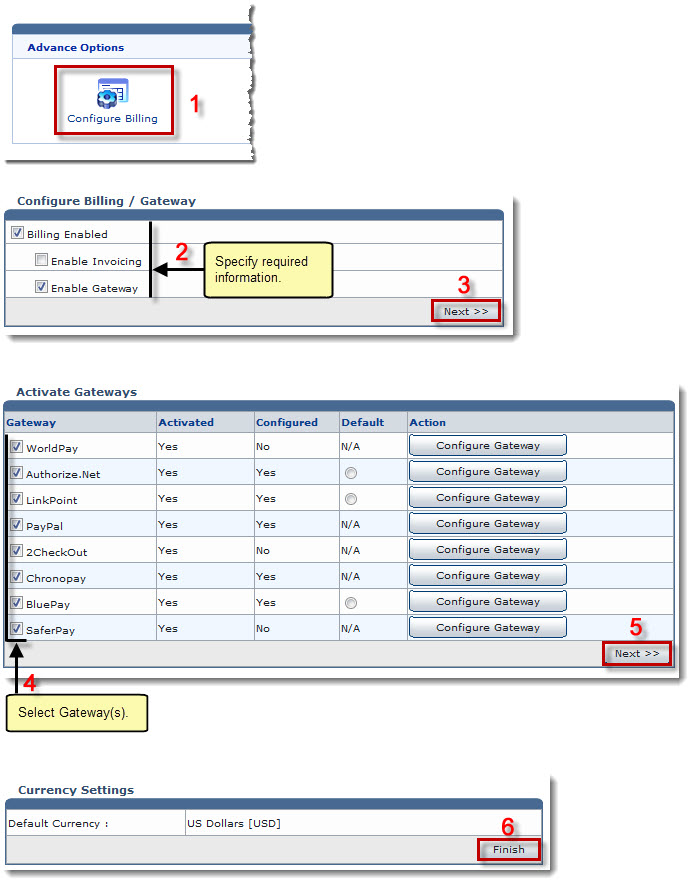
- Under Advance Options, click Configure Billing.
The Configure Billing page is displayed.
- Select the Billing Enabled check box.
- Select the Enable Gateway check box.
- Click Next.
The Activate Gateways page is displayed.
 |
The Gateway column shows name of the gateway. On making payment, customer sees this name on interface. |
|
The Activated column shows the current status of gateway. It can be Yes if the gateway is activated and No if not activated. |
|
The Configured column shows if the gateway is configured or not. If the gateway is configured, its value is Yes, otherwise No. |
|
The Default column shows whether the respective gateway is the default one or not. In case the gateway is activated but not configured then the payment page shows error. |
|
The Action column allows to configure the respective gateway. A gateway can only be configured if it is enabled. |
- Under Gateway column, select the required check boxes.
- Click Next.
The Currency Settings page is displayed.
- Click Finish.
The selected Gateways are enabled.
 |
The gateways must be configured, once they are enabled. |
See also