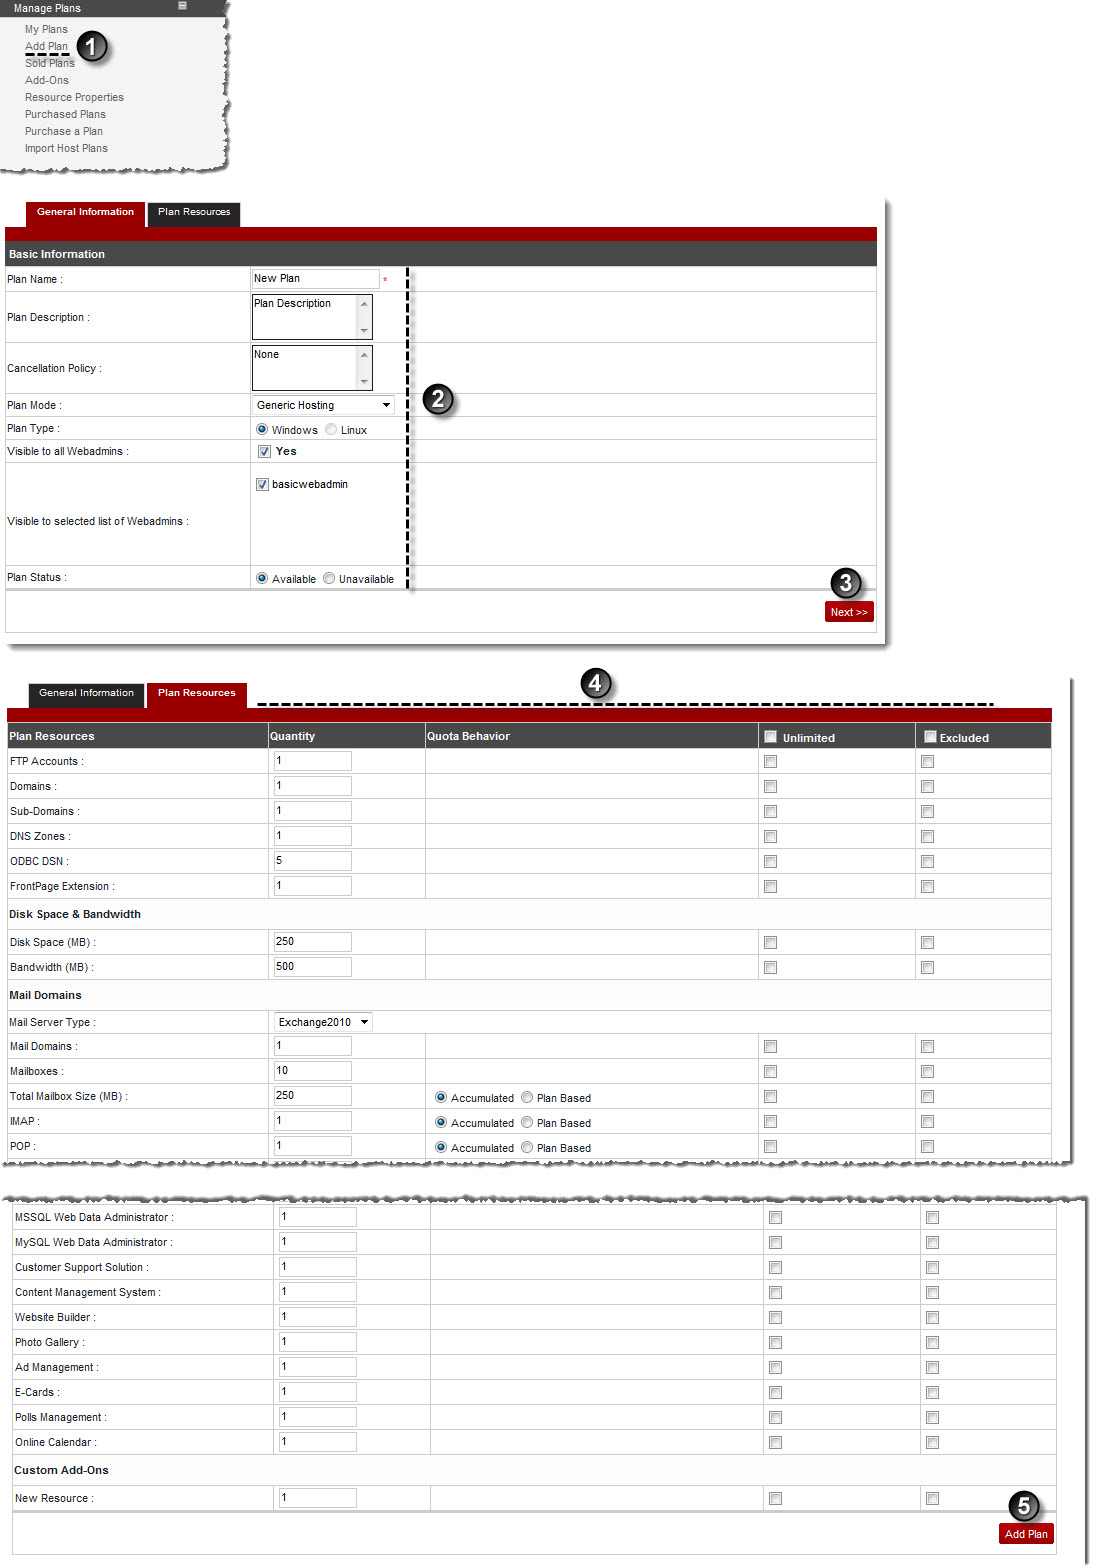
A drop-down displays.
The General Information page displays.
- Plan Name: Type name of the plan.
- Plan Description: Type brief description of the plan.
- Cancellation Policy: Type required policy to cancel the plan.

Cancellation Policy can be one for all the plans or it can be separate for each plan, depending on the hosting business rules. - Plan Mode: Select mode of the plan from the drop-down list box.
Available options for Plan Mode are: 
Generic Hosting
Mail Only Hosting
DNS Only Hosting
SharePoint Only Hosting - Plan Type: Select type of the plan.
- Visible to All Webadmins: Select Yes check box to make plan visible to all the resellers.
- Visible to selected list of Webadmins: Select required resellers who can view the plan.
- Plan Status: Select the status of the plan.
Available options for Plan Status are:
Available
Unavailable
Selecting Plan Status as Unavailable disables the Sell (button) for this plan and also users cannot view such plan.
The Billing Information page is displayed.
|
The Billing Information tab is visible only if Billing is enable. To enable billing, refer to Configuring Billing. |
- Setup Price: Type price of the plan, when it is sold for the first time.
- Promotional Duration: Select duration for promotion from the drop-down list box.
The Promotional Duration is used to set a discount for a specific period of time on the plan. For example, to offer a 50% discount on a $20/month plan for one month then select 1 Month here. Panel charges $10 for 1 month and $20 from the 2nd month onwards. - Promotional Price: Type price for the promotional duration.
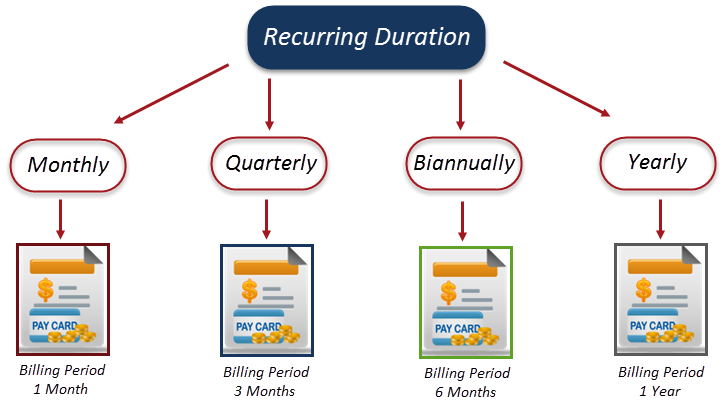
- Recurring Duration: Select Other option for Recurring Duration from the drop-down list box.
It is the period of time after which user (reseller) is charged i.e. Monthly/Quarterly/Biannually/Yearly/Other. For example, on selecting Quarterly the user is charged after every quarter of year i.e. 3 months. The Recurring Duration starts when the Promotional Duration ends. If there was no promotional period then the Recurring Duration starts with the plan setup.
- Recurring Price: Type recurring price.
For example, on specifying 10, the user is charged $10 after the Promotional Duration. - Default Recurring Duration: Select Default Recurring Duration from the drop-down list box.
- Default Setup Discount: Type default amount for setup discount.
- Default Recurring Discount: Type default amount for recurring discount.
The Plan Resources page is displayed.
- Quantity: Type the quantity of the respective resource to be added in the new plan.
- Quota Behavior: Select the quota behavior i.e. Acculumated or Plan Based.
- Unlimited: Select the Unlimited check box at the top to make quantity of all the resources added in this plan as unlimited.
To add selective unlimited resources, select the respective check box under Unlimited column for that resource. - Excluded: Select the Excluded check box at the top to exclude all the resources in the plan.
To exclude selective resources, select the respective check box under Excluded column for that resource.
The Plan is added with the specified information.