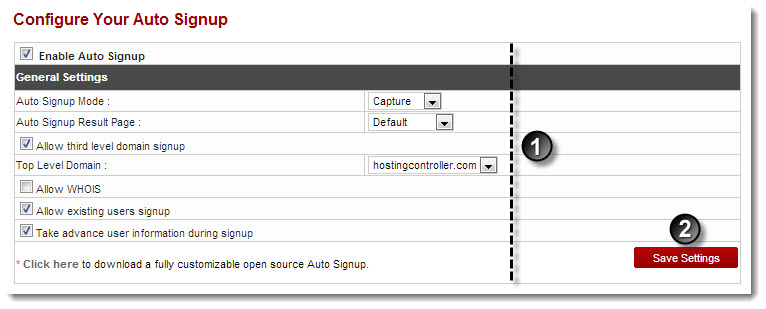
A drop-down displays.
The General Settings page displays.
- Auto Signup Mode: Select mode for auto signup from the drop-down list box.
The available options for Auto Signup Mode are: 
Capture: In this mode, the order is confirmed as the signup ends. 
Authorize: In this mode, user status remains pending till the owner confirms the order. - Auto Signup Result Page: Select result page for auto signup from the drop-down list box.
The available options for Auto Signup Result Page are: 
Default: In this case, it displays HC result page. 
Custom URL: In this case, specify the URL. It is required to redirect users to some other/custom page after completing the signup. - Allow Third Level Domain Signup: Select the check box to allow signup for third level domain.
- Top Level Domain: Select the top level domain from the drop down list box.
- Allow WHOIS: Select the check box to allow whois functionality.
- WHOIS Server: Type WHOIS server name.
- Allow Existing Users Signup: Select to allow current users to signup.
- Take Advance User Information during Signup: Select to take advance level user information while signup.
The Auto Signup is configured.

