Home > Reseller Manual > Toolbox > Tools > System Services > Exchange Manager > Public Folders > Setting Permissions
Setting Permissions
To set permission for a public folder:
- Log on to HC panel.
- From the left menu click Toolbox, and then Tools.
The Tools Options page is displayed.
- Under System Services section, click Exchange Manager.
The Exchange Enabled Organizations page is displayed.
- Under the Organization Name column, click name of the organization, and then Public Folders.
The Public Folders page is displayed.
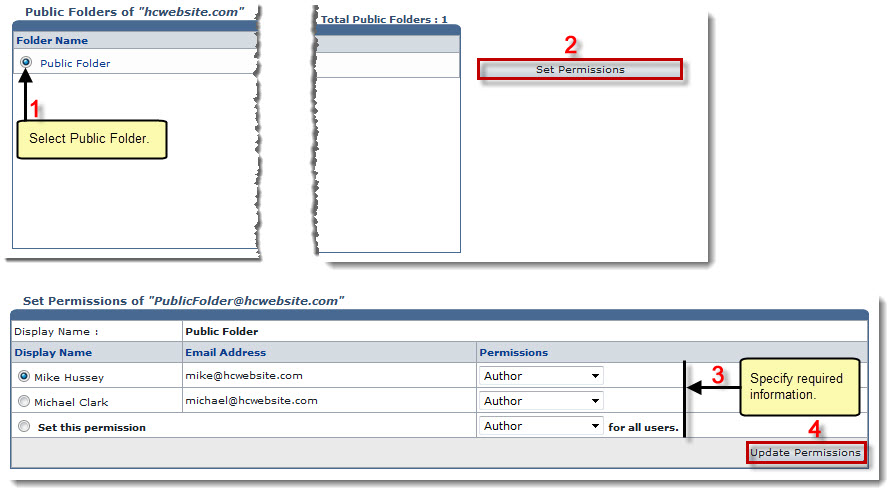
- Under the Folder Name column, click name of the public folder, and then Set Permissions.
The Set Permissions page is displayed.
- Under Permissions column, select required permissions from the drop-down list box for the respective users.
 |
To assign same permission for all the users, click Set this Permission. |
- Click Update Permissions.
The Permissions are set.

See also

