Home > Host Manual > Hosting Plans > Manage Plans > Switching a Plan
Switching a Plan
To switch a plan:
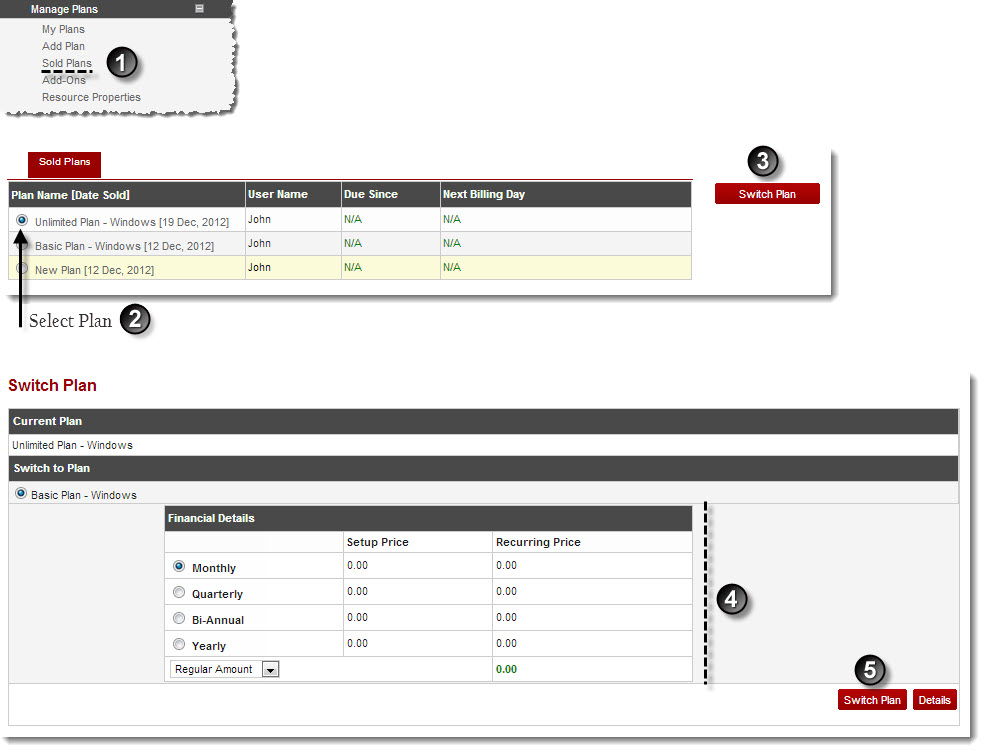
- Log on to hc9 panel.
- From the left menu click Hosting Plans, and then Manage Plans.
A drop-down displays.
- Click Sold Plans.
The Sold Plans page displays
- Under User Name column, select user and click Switch Plan.
The Switch Plan page displays.
 |
Users may require to switch a plan when they want to upgrade from a plan with limited resource to a plan with more resources/resources that meets their requirements. |
- Select required plan.
- Select recurring duration as required.

|
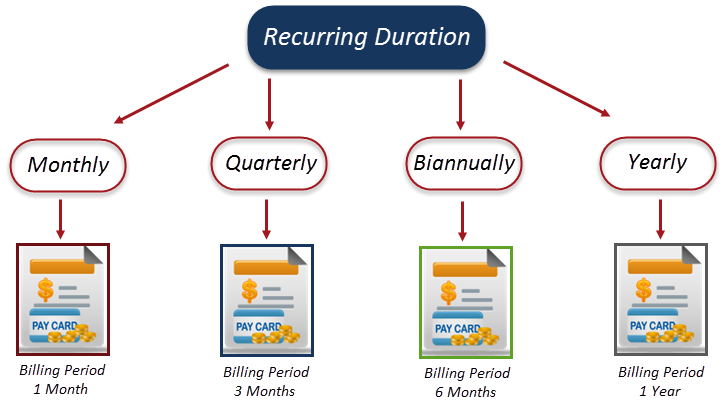
It is the period of time after which user (reseller) is charged i.e. Monthly/Quarterly/Biannually/Yearly/Other. For example, on selecting Quarterly the user is charged after every quarter of year i.e. 3 months. The Recurring Duration starts when the Promotional Duration ends. If there was no promotional period then the Recurring Duration starts with the plan setup.
|
| |
 |
 |
Regular Amount: Select if price of new plan is charged from the user and no adjustments are made from the previous plans. |
 |
Adjusted Amount: Select if price of new and previous plans are adjusted and user have to pay this adjusted amount. |
- Click Switch Plan.
The plan is switched.
 |
To view detailed information of any plan, select the plan and then click Details. |

See also


