
| Product Documentation
Mail Data Migrator
Adding a Project
As mailboxes always come as part of mail domains, it’s imperative to specify a mail domain for the intended migration. Mail Data Migrator allows three types of migrations.
• To Office 365
• To Microsoft Exchange
• To Non-Exchange Mail Servers
For all the above migration types, a mail domain needs to be specified. Mail domain should exist in the source and target mail server prior to the transfer. Once the mail domain is added its mailboxes can be migrated via Mail Data Migrator.
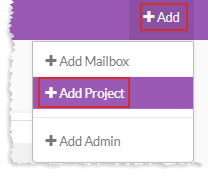
To add a domain, click +Add from the top menu and then +Add Project. Specify required details to proceed.
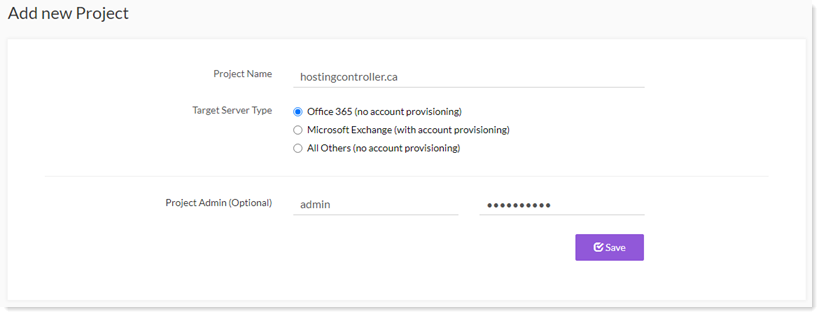
- Target Server Type: Select any of the three types of migrations as required.
- Office 365: Mailbox data can be migrated from any mail server to Office 365. This type of migration only supports the transfer of email data, without the provisioning of a new mailbox in Office 365. A corresponding mailbox should exist in Office 365 prior to the move.
- Microsoft Exchange: Mailboxes along with their data can be migrated from any mail server to On-premises Exchange. This type of migration supports the transfer of email data plus the provisioning of a new mailbox in Exchange. Therefore no prior mailbox is required in the target server. Mail Data Migrator handles the provisioning part.
- All Others (Non-Exchange Mail Servers): Mailbox data can be migrated from any legacy mail server to another. This again involves just the migration of mailbox data without the provisioning element. Here a corresponding mailbox should exist in the target server prior to the move.
- Project Admin: Super Admins may allow the creation of a project Admin with its mail domain but the facility is optional. In other words a mail domain can be created with or without its project admin initially.
Office 365 & all others
In case of migration to Office 365 or any other legacy mail server, specify mail domain details for the source and target mail servers.
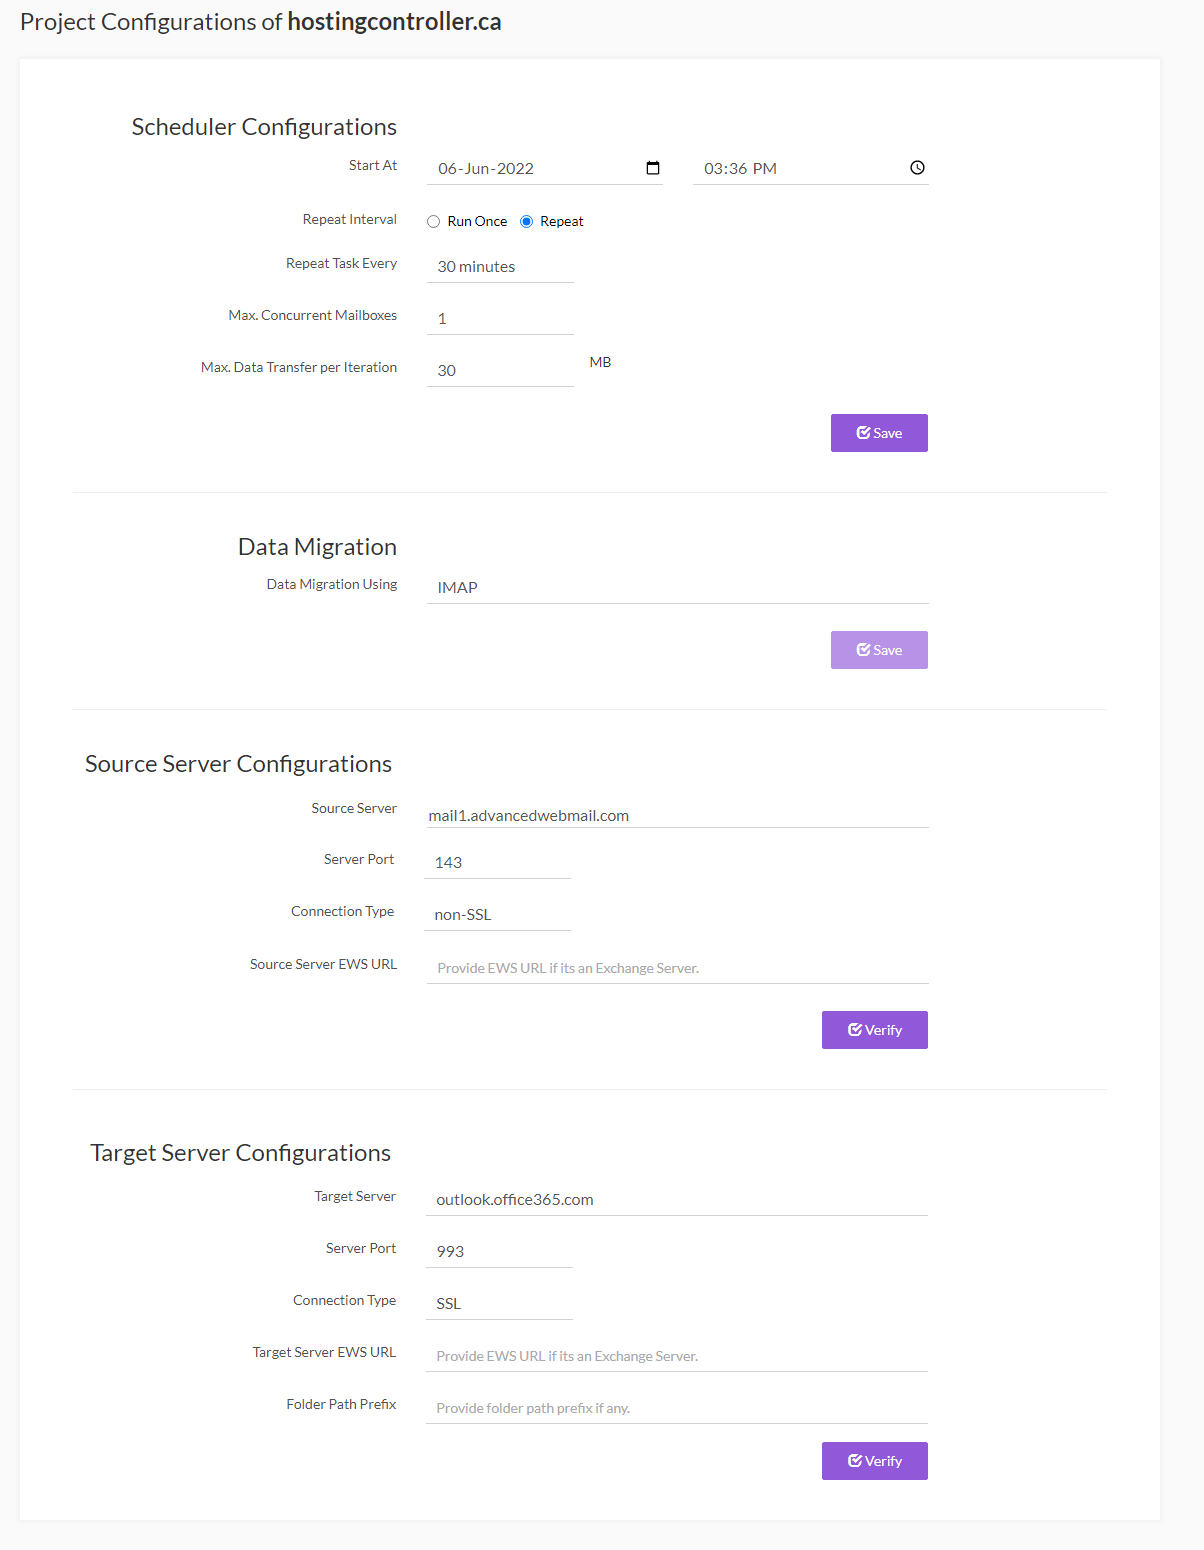
- Scheduler Configurations:
- Start at: Select date and time when the scheduler is started.
- Repeat Interval: Select whether scheduler should repeat or run once.
- Repeat Task Every: Type minutes after which the shceduler is repeated.
- Max. Concurrent Mailboxes: Type number of mailboxes.
- Data Migration:
- Data Migration Using: Sometimes users refrain from providing IMAP access (such as IMAP ports etc.) while migrating mailboxes. For such cases migration can be performed using EWS access. Migration can be performed, either using IMAP or EWS.
IMAP Configurations:
-
-
- Source Server Configurations:
- Source Server: Specify the IMAP server address e.g. mail.domain.com or the IP of the source mail server.
- Server Port: Specify the IMAP port. By default IMAP uses port 143 however to connect securely use 993 which is the port for SSL/TLS encrypted IMAP.
- Connection Type: Indicate if you would like to use a secure or a non-secure connection.
- Target Server Configurations:
- Target Server: Specify the IMAP server address e.g. mail.domain.com or the IP of the target mail server.
- Server Port:Specify the IMAP port. By default IMAP uses port 143 however to connect securely use 993 which is the port for SSL/TLS encrypted IMAP.
- Connection Type: Indicate if you would like to use a secure or a non-secure connection.
- Source Server Configurations:
-
EWS Configurations:
-
-
- Source Server Configurations:
- Username: Specify the email address of any one of mailboxes of the mail domain added in the project.
- Password: Type password for the mailbox.
- Source Server EWS URL: Specify EWS URL for the source server.
- Target Server Configurations:
- Username: Specify the email of any one of mailboxes of the mail domain added in the project.
- Password: Type password for the mailbox.
- Target Server EWS URL: Specify EWS URL for the target server.
- Source Server Configurations:
-
Microsoft Exchange
In case Microsoft Exchange option is selected, specify mail domain details for the source and target mail servers.
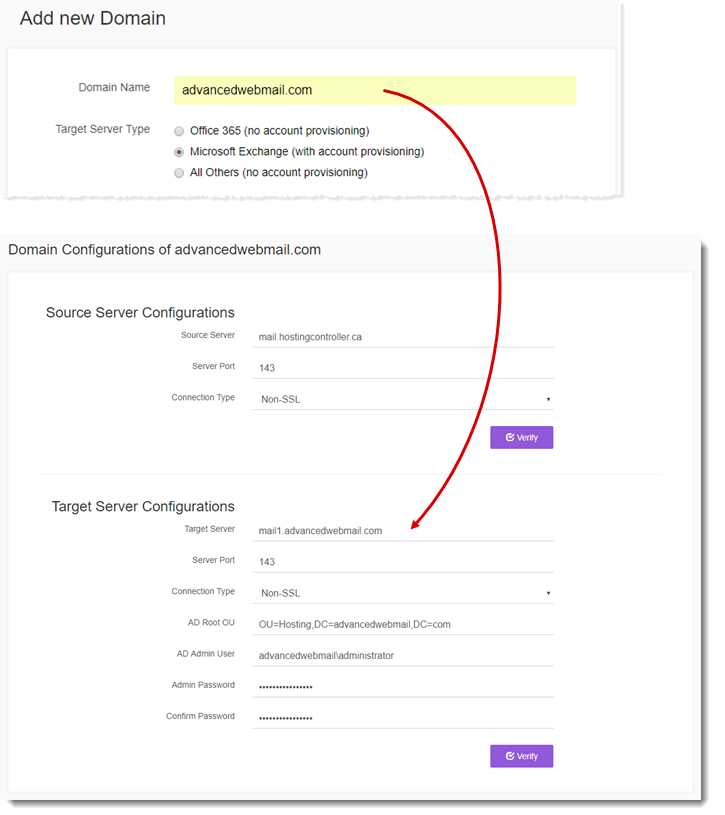
- Source Server Configurations:
- Source Server: Specify the IMAP server address e.g. mail.domain.com or the IP of the source mail server.
- Server Port: Specify the IMAP port. By default IMAP uses port 143 however to connect securely use 993 which is the port for SSL/TLS encrypted IMAP.
- Connection Type: Indicate if you would like to use a secure or a non-secure connection.
- Target Server Configurations:
- Target Server: Specify the IMAP server address e.g. mail.domain.com or the IP of the target mail server.
- Server Port: Specify the IMAP port. By default IMAP uses port 143 however to connect securely use 993 which is the port for SSL/TLS encrypted IMAP.
- Connection Type: Indicate if you would like to use a secure or a non-secure connection.
- AD Root OU: Specify the distinguished name (DN) of the root Organizational Unit (OU), where the AD users would be created.
- AD Admin User: Provide either a Project Administrator or a user having Project Admin rights. As this user would be used for creation of mailboxes in Exchange it should have permissions on Exchange as well.
- Admin Password: Indicate password for the administrator.
- Confirm Password: confirm admin password.
After specifying pertinent settings they need to be verified. Clicking the “Verify” button verifies the provided source and target server settings and saves them in database. Successful verification generates a success message. If in future any of them change in the source or target server, Mail Data Migrator generates an exception in its “Error Logs” indicating a mismatch.