| Product Documentation
Mail Data Migrator
Quick Start Guide
Mail Data Migrator quick start guide enables you to get started in minimal possible steps after install and walks you through all the essentials of email migration at a go.
Mail Data Migrator utility can be installed on any machine running Windows OS including your personal system. The supported versions are Windows 7,8,10 or Server 2008 and above. There is absolutely no need to install it on the machines where mail servers are running because the utility connects to the source and target mail servers remotely. The source and target mail servers should use IMAP enabled mailboxes and because of this requirement IMAP request should be allowed in the firewall on both source and target mail servers. To view pre-requisites in detail, see System Requirements.
1) Activate License
After a successful install of Mail Data Migrator, the first thing to be done after login is to activate the license. The trial license allows you to test the utility with only two mailboxes. To overcome this limitation and use the tool with its full feature set, it’s essential to activate the license.
2) Add Project
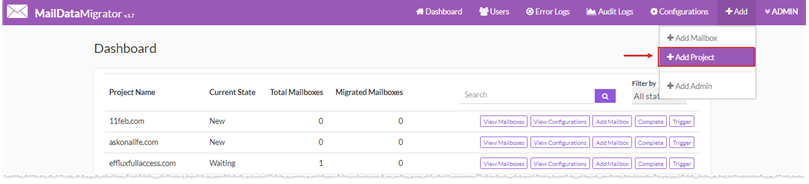
Add the mail domain (SMTP address) whose Mailboxes are to be migrated. To add a mail domain, click +Add from the top menu and then +Add Project.
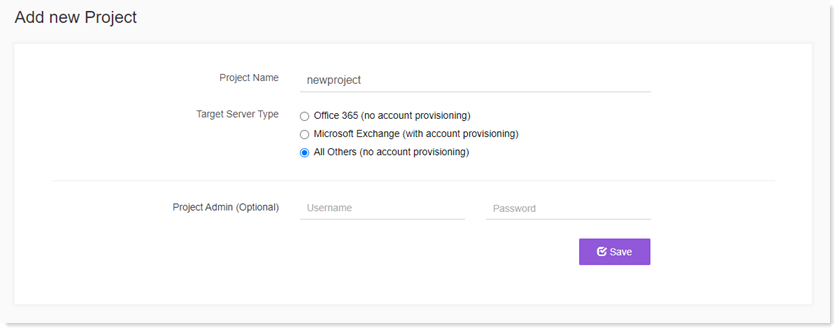
Specify the project name and the Target Server Type.
- Office 365 (no account provisioning): Select this option if you are migrating to Office 365. This option does not carry the provision for creating a mailbox in the target server. Only mail data will be migrated.
- Microsoft Exchange (with account provisioning): Select this option if you are migrating to On-premises Exchange and you want that migration utility also create user in AD and mailbox in Exchange.
- All Others (no account provisioning): Select this option if you are migrating to a simple non-Exchange mail server. This again does not carry the provision for creating a mailbox in the target server. Only mail data will be migrated.
For the purpose of simplicity we will take the example of Office 365 i.e. option 1.On the next screen provide the source and target server configurations for connectivity.
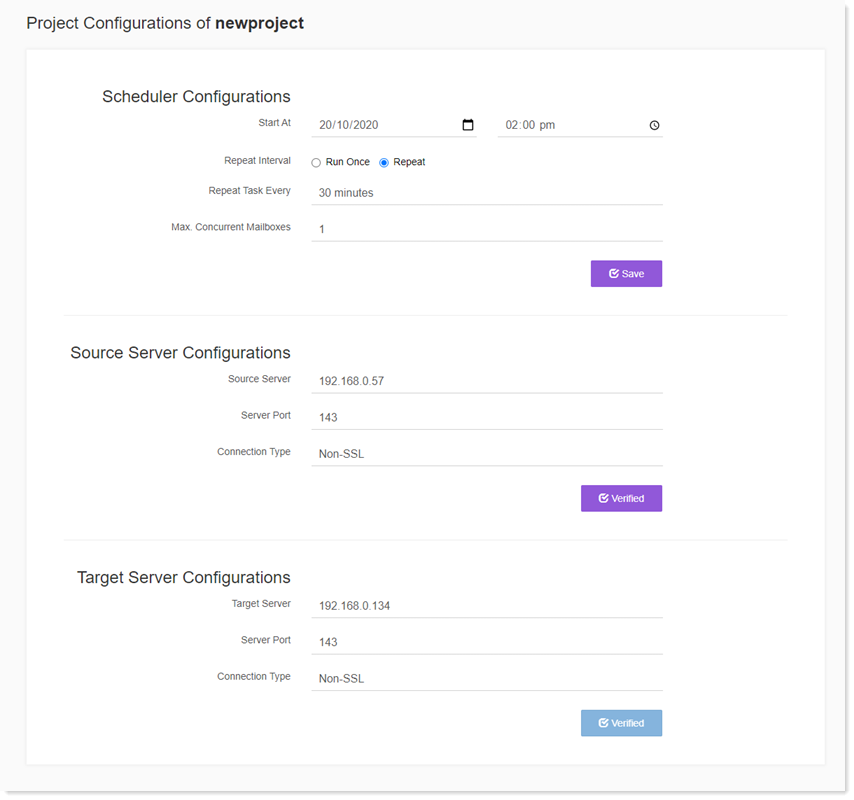
- Source Server Configurations:
- Source Server: Provide the address of the source mail server, where the mail domain resides. This can either be the mail server address in the form mail.domain.com or the IP address.
- Server Port: Insert the IMAP port. Port without SSL is 143 while with SSL is 993.
- Connection Type: Indicate if you would like to use a secure or a non-secure connection.
- Target Server Configurations:
- Target Server: Provide the address of the source mail server, where the mail domain resides. This can either be the mail server address in the form mail.domain.com or the IP address.
- Server Port: Insert the IMAP port. Port without SSL is 143 while with SSL is 993.
- Connection Type: Indicate if you would like to use a secure or a non-secure connection.
3) Add Mailbox
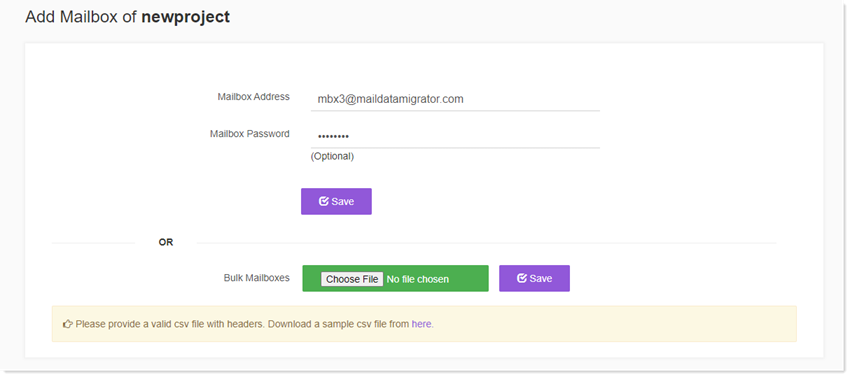
Now Add the mailbox whose email data is to be migrated over. To add a Mailbox, click +Add from the top menu and then +Add Mailbox. Mailbox can also be added through the Add Mailbox button on the Dashboard. Mailboxes can be added individually or in bulk.

Normally you are presented with two scenarios while adding a mailbox. You might know the mailbox password or the mailbox password is not known. Both scenarios have a different verification procedure.
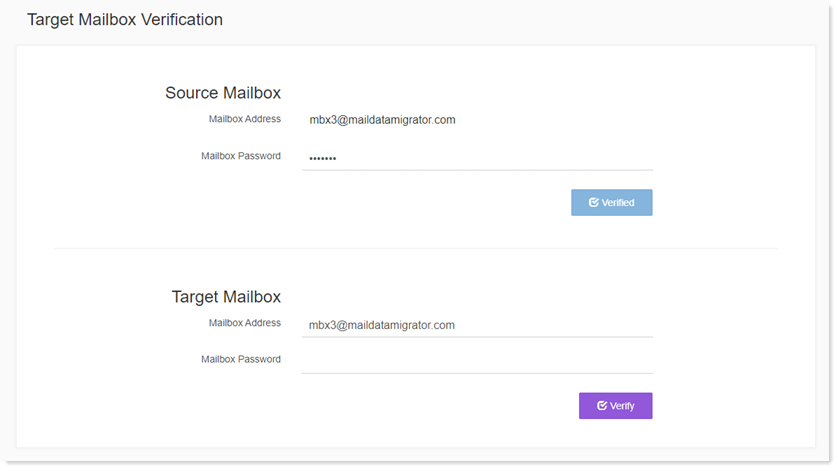
You know the password
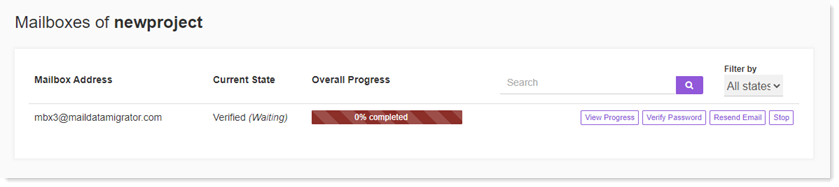
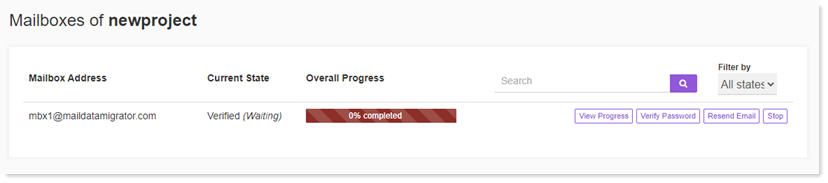
If you know the password, Mail Data Migrator will simply ask you to verify the target mailbox by inserting the correct password. Once you insert the correct password, it will verify the mailbox and put it in a waiting state.
You don't know the password
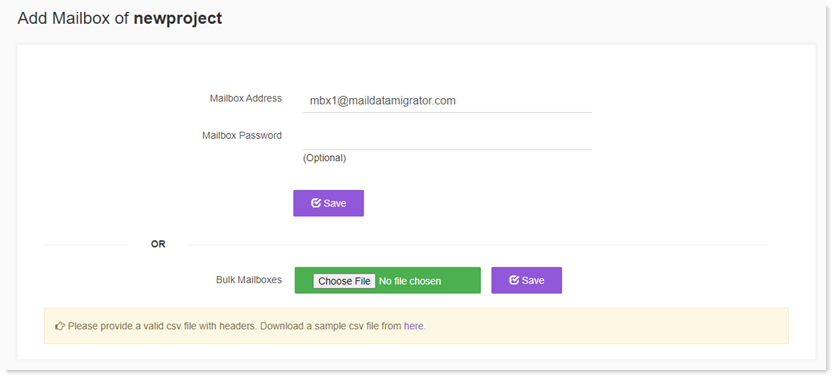
If you don’t know the password, Mail Data Migrator will put the mailbox in a waiting state and simultaneously send an email to the source mailbox with a web URL link. You can enter the correct password using that URL link. Once you login with the correct password, it will verify the mailbox.

4) Commence Migration
The actual email data migration commences after the desired Mailboxes have been added. Mail Data Migrator schedules a task at the back-end in the Windows Task Scheduler which runs at a specified time interval. Only after the scheduler runs can the syncing process initiate. Although the scheduler runs at a specified time interval, you may forcefully trigger it in the Windows Task Scheduler.

Although the scheduler runs at a specified time interval, you may forcefully trigger it through the Trigger button.

5) Complete Migration
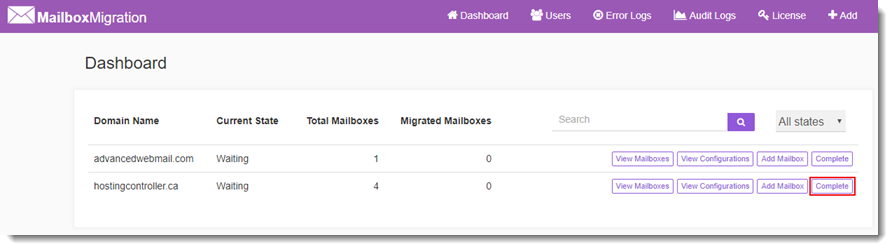
Once all Mailboxes have been migrated you can simply remove the mail domain from the Mail Data Migrator interface. To remove the mail domain click the Complete button in front of the domain on the Dashboard. Then hit the Delete button to remove it altogether from the interface.