
| Product Documentation
Efflux Migrator
Pre-requisites for Microsoft 365
This page lists minimum System Requirements for Onboarding to and Offboarding from Microsoft 365. For more details please consult our support team.
Where to Install Efflux
In the case of onboarding to Microsoft 365, Efflux Migrator will be installed on the source on-premises forest. In case of offboarding from Microsoft 365, Efflux will again be installed on the target on-premises forest. In both cases Efflux will be installed on the on-premises DCs.
Pre-requisites for Multi-Factor Authentication (MFA)
- Download Microsoft Azure Active Directory Module for Windows PowerShell utility from the following link: https://downloads.hostingcontroller.com/misc/utilities/csp/AdministrationConfig_3.msi
- Download Microsoft Online Services Sign-In Assistant utility from the following link: https://downloads.hostingcontroller.com/misc/utilities/csp/msoidcli_64.msi
- Restart the Target Exchange Server (In off-peak hours) after installation of Microsoft Azure Active Directory Module for Windows PowerShell and Microsoft Online Services Sign-In Assistant utilities.
- The O365 user must be the Global Administrator for successful connectivity in Efflux.
- Make sure MRS proxy is enabled on the EWS virtual directory on On-Premise Exchange Server, the Internal and External URL for EWS should also be configured with valid SSL certificate.
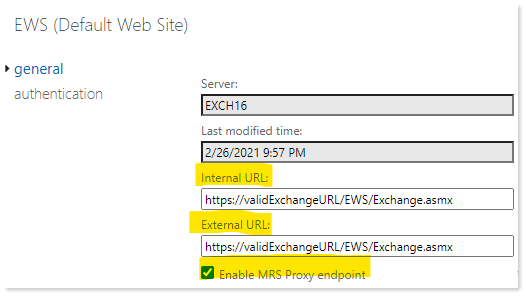
-
Microsoft Exchange Mailbox Replication service should be running on the On-Premise Exchange Server.
-
AzureAD & Exchange Online PowerShell V2 (abbreviated as EXO V2) modules are mandatory. It can be installed by running PowerShell as Administrator(https://docs.microsoft.com/en-us/powershell/exchange/exchange-online-powershell-v2?view=exchange-ps). Refer to the detailed instructions below:
Details of the Procedure:
-- Open PowerShell by clicking on the search box at the taskbar and type PowerShell. This will bring up the PowerShell edition of your preference.
-- Look for Windows PowerShell or just PowerShell.
-- Right-click and select Run as Administrator.
-- Run Install-Module -Name ExchangeOnlineManagement
-- In some cases, error shown in below screenshot is encountered. To Resolve the error, an additional command is required to be run which is mentioned below.
[Net.ServicePointManager]::SecurityProtocol = [Net.SecurityProtocolType]::Tls12
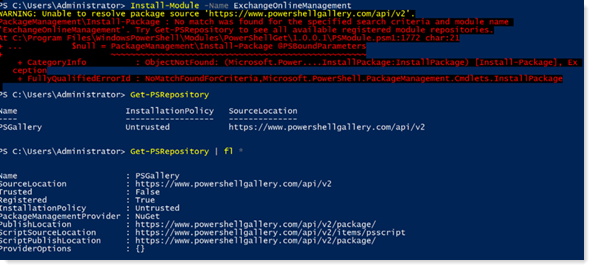
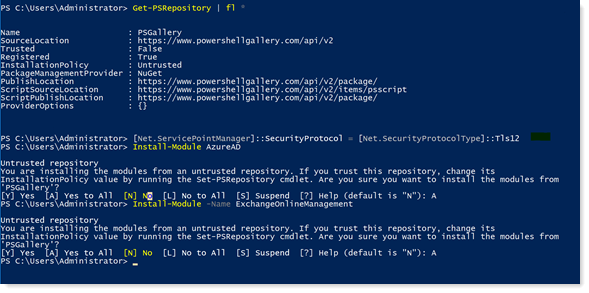
Steps required for Connectivity with O365 using MFA
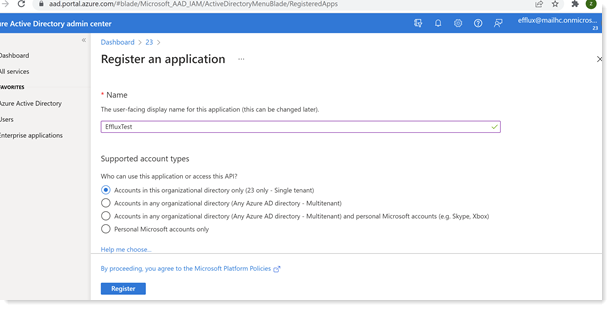
-- Register the application in Azure Active directory
https://docs.microsoft.com/en-us/powershell/exchange/app-only-auth-powershell-v2?view=exchange-ps-- Register your application by clicking on new registration.
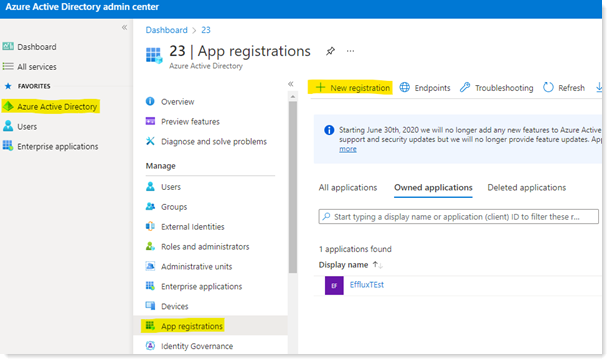
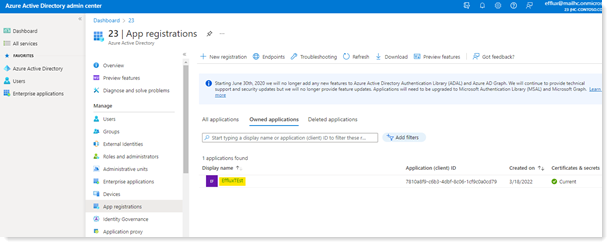
On the App overview page under Management, select Manifest.
-
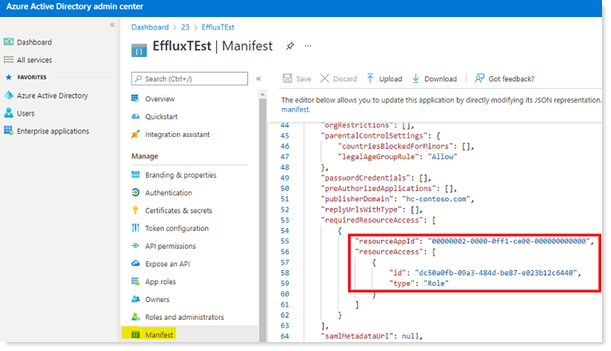
Change the three values marked in the screenshot below which are also mentioned in Microsoft’s article. When you're finished, click Save.
-
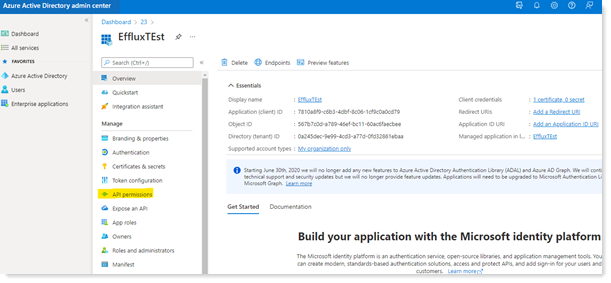
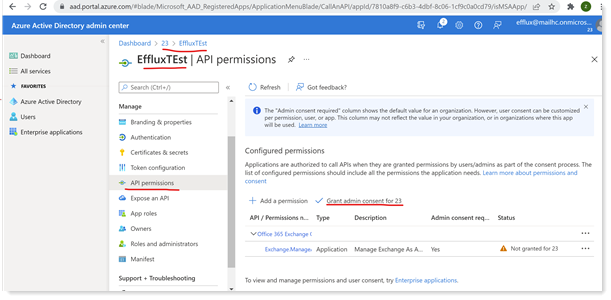
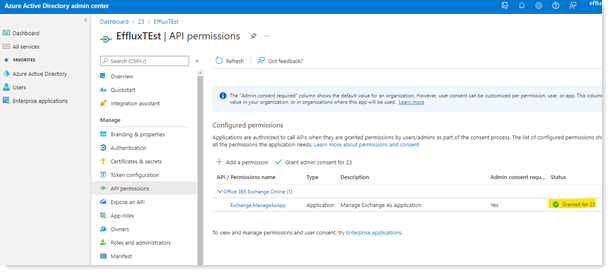
on the APP Overview page, under Manage, select API permissions and grant the permission for Efflux.
-
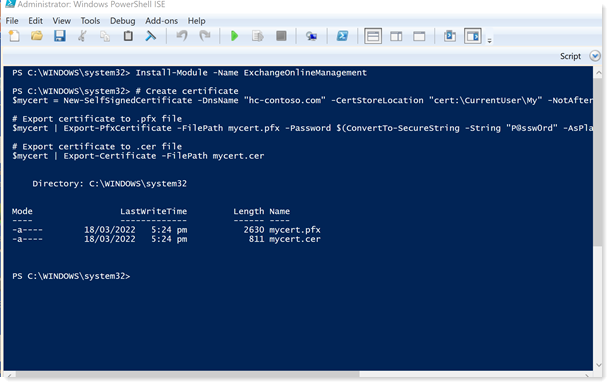
Generate a self-signed certificate on the server where efflux is running. You can use the following commands on
# Create certificate
$mycert = New-SelfSignedCertificate -DnsName "contoso.org" -CertStoreLocation "cert:\CurrentUser\My" -NotAfter (Get-Date).AddYears(1) -KeySpec KeyExchange
# Export certificate to .pfx file
$mycert | Export-PfxCertificate -FilePath mycert.pfx -Password $(ConvertTo-SecureString -String "P@ssw0Rd1234" -AsPlainText -Force)
# Export certificate to .cer file
$mycert | Export-Certificate -FilePath mycert.cer
-
Attach the certificate to the Azure AD application. After you register the certificate with your application, you can use the private key (.pfx file) or the thumbprint for authentication.
On the Apps registration page, select your application as seen in the screenshot.
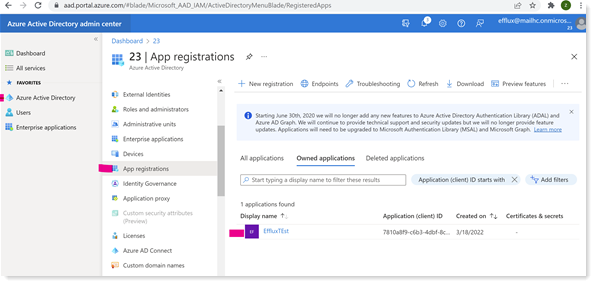
On the application page that opens, under Manage, select Certificates & secrets. And click on upload.
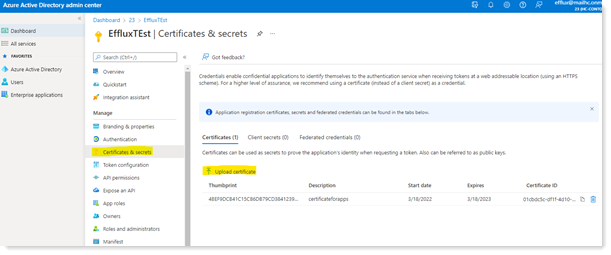
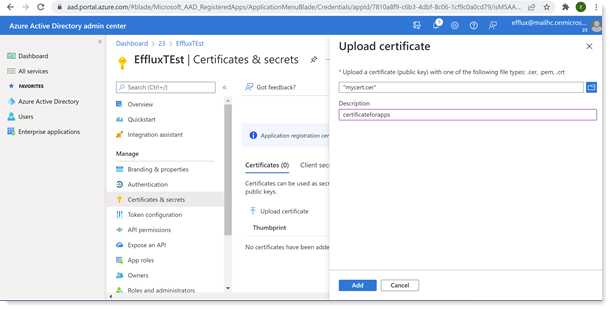
-
Assign Azure AD roles to the application
On the Azure AD portal at https://portal.azure.com/, under Manage Azure Active Directory, click View.
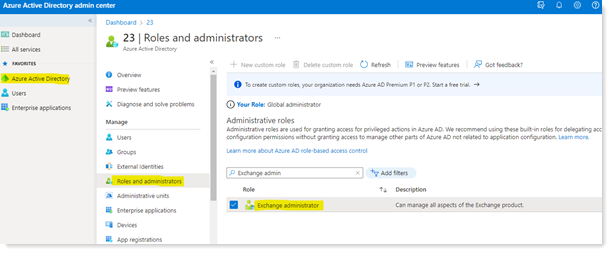
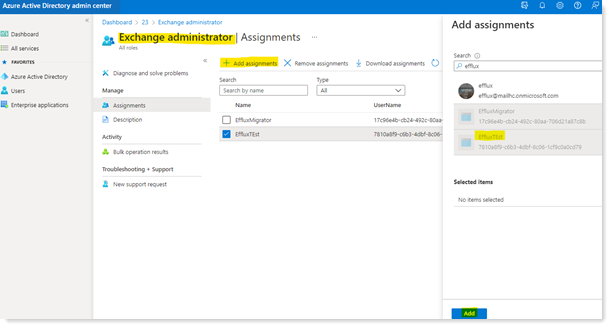
On Efflux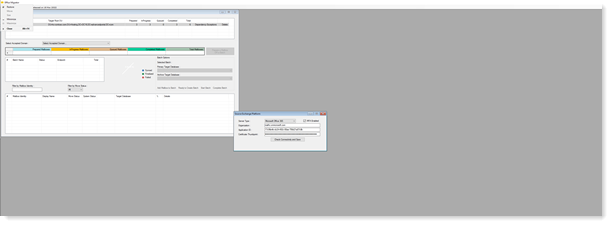
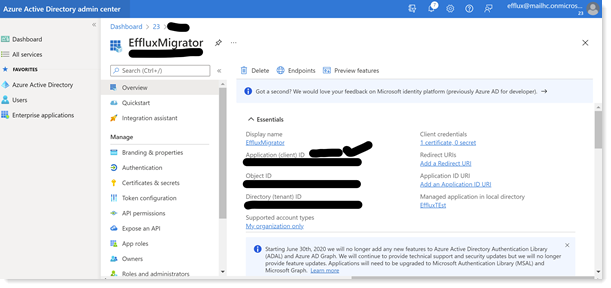
Get Application ID and Thumbprint from portal.azure.com and insert these values in Efflux to be able to connect with your O365 successfully. Thumbprint can be fetched from Certificates & secrets page under APP overview page. Refer to the screenshot below for more details: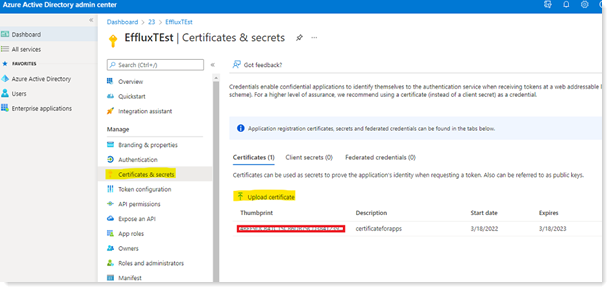
Supported Versions of Exchange for Office 365 Onboardings
Efflux Migrator supports MS Exchange versions 2010 through 2019 for Office 365 onboardings. Exchange mailboxes from Exchange 2010, 2013, 2016 and 2019 on-premises versions can be transitioned to Office 365.