| Product Documentation
HC Marketplace
Customers
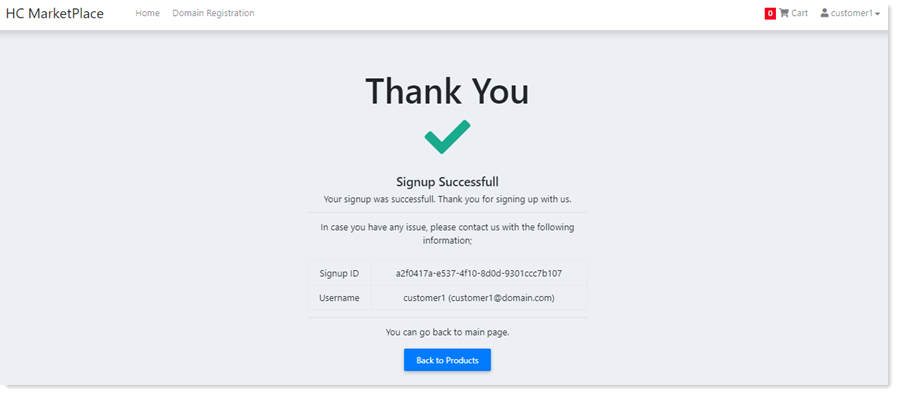
Customers are users who purchase various services from the host. They are invoiced by the host and make payments for the purchases. Either the host can create customers through its admin interface or customers can register themselves in the online store.
Customer Registration
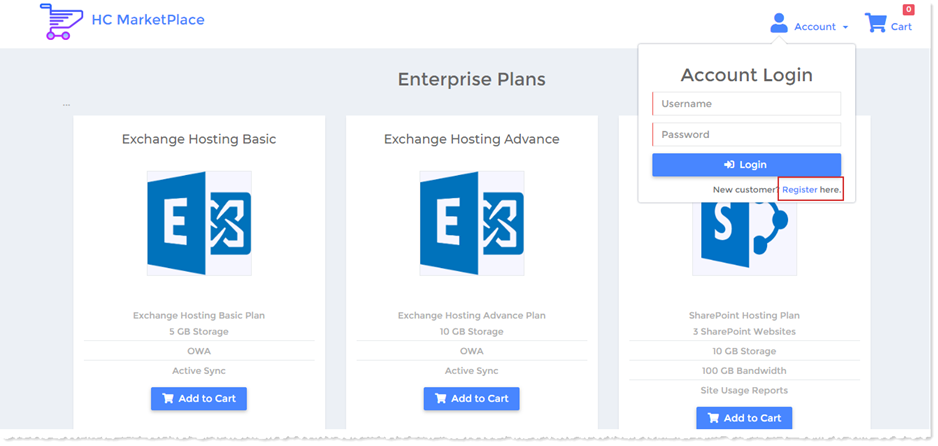
To logon as a customer, the customer needs to register an account in the Marketplace. Click Register to proceed.
The customer needs to specify the following information to register an account.
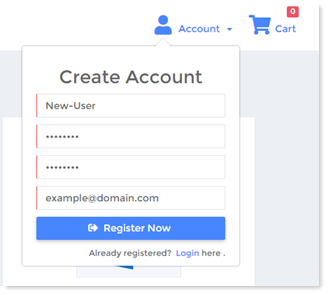
- Username: Type username without space.
- Password: Type password that should not be less than 8 characters.
- Confirm Password: Retype your password.
- Email Address: Type email address.
Customer cannot have space in its username.
View Customer Dashboard
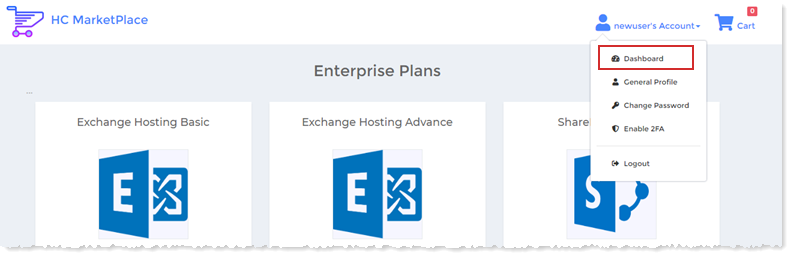
Once customer is logged on, it can navigate to the drop-down menu at top right corner and click Dashboard. Customer dashboard displays to the customer its billing preferences and billing information. On the dashboard the customer can view all its subscriptions, invoices, receipts and orders at a glance. Moreover the customer can create new billing profiles and add funds to its wallet.
My Wallet
Customer wallet is a type of pre-paid account in which a customer can store its money for any future online transaction. Customer initially adds funds to its wallet to purchase various products from the host. As long as the wallet has sufficient funds, the customer can continue purchasing. After every subsequent purchase, the available balance in the wallet decreases and unless the wallet is not refueled, it is depleted of funds. Without sufficient funds in the wallet, the customer would be prevented from buying further. Wallet may also be debited for settling recurring payments. If there are sufficient funds in the wallet, it can automatically be charged for settling recurring payments. The dashboard permits the customer to add funds to its wallet. Funds can only be added through a credit card. The customer is required to create a billing profile and then add funds through the profile to its wallet.
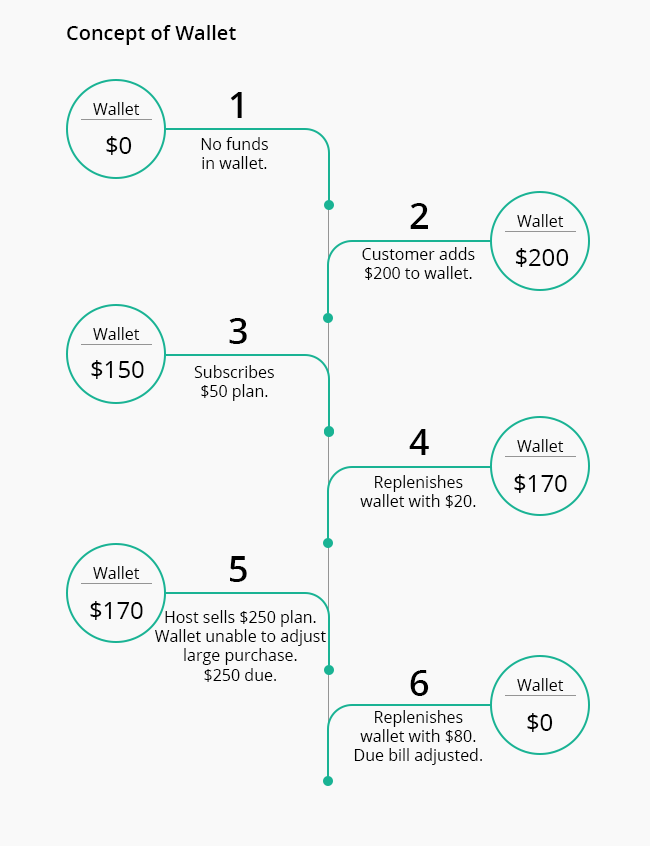
Add Funds to My Wallet
The dashboard permits the customer to add funds to its wallet. Funds can only be added through a credit card. The customer is required to create a billing profile and then add funds through the profile to its wallet.
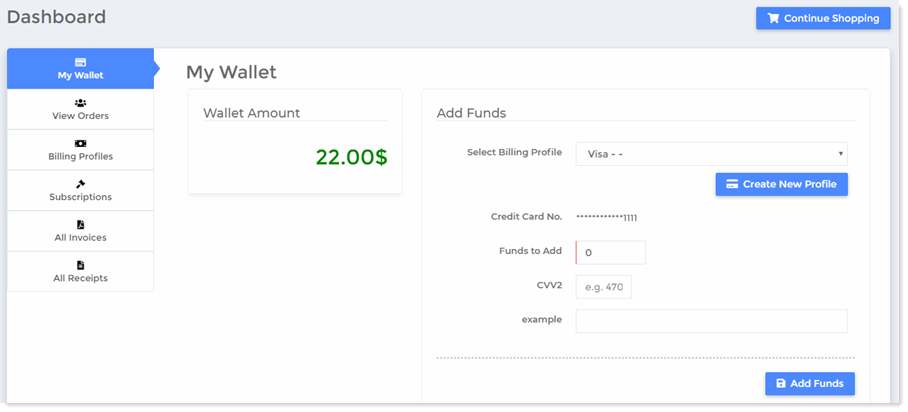
- Select Billing Profile: Here the customer can select a billing profile from a list. Customer can add more than one billing profiles to its account. If there are more than one billing profiles, it can choose the profile to make payment from.
- Create New Profile: This allows the customer to add a new billing profile.
- Credit Card Number: This displays the last four digits of the credit card number.
- Funds to Add: This allows the customer to type the amount to be added as fund.
- CVV2: It is the CVV2 number mentioned at the back of the credit/debit card.
- Custom Field: If the host has specified custom fields for the billing profile, they are displayed here. They are additional fields, meant to provide extra information, for customers.
View Orders
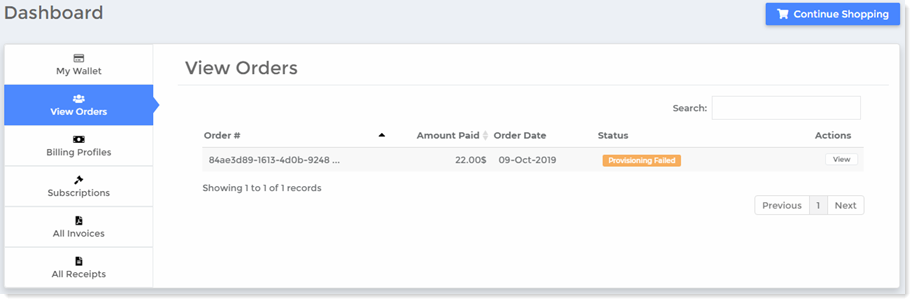
This section shows order details for any specific customer. Under Actions column, click View to have detailed information about the order.
View Billing Profiles
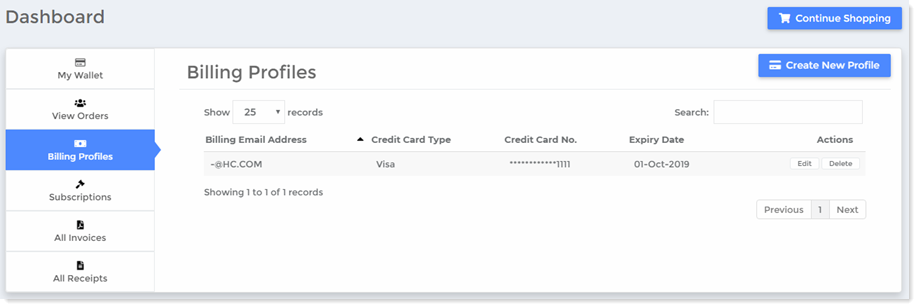
This section shows billing profiles of any specific customer. A customer can have more than one billing profiles. The customer can even have more than one billing profiles of the same credit card type (Visa, Mastercard etc.). The customer can create/edit/delete billing profiles as required.
Create New Profile
To create new profile, specify required information as follows:
- First Name: Type first name of the customer.
- Last Name: Type last name of the customer.
- Email Address: Type email address of the customer.
- Billing Address: Type billing address of the customer for billing related correspondence.
- City: Type city of the customer.
- Country: Select country of the customer.
- Province/State: Select province/state of the customer.
- Postal Code: Type postal code of the customer.
- Phone: Type phone number of the customer.
- Fax: Type fax number of the customer.
- Payment Mode: Select payment mode.
- Credit Card No: Type credit card number.
- Expiry Date: Select expiry date of the credit card.
- Custom Fields:
View Subscriptions
Subscriptions are basically purchased products. Customers can purchase subscriptions from the host. This section displays all subscriptions purchased by the customer.
View Registered Domains
This section displays all the registered domains, registered by the customer.
- Registration Date: It is the date on which the domain was registered.
- Expiration Date: It is the expiry date of the domain.
- Renew Domain For: The Marketplace allows the customer to renew domains for various periods such as 1 year, 2 years, 5 years etc.
The renewal periods can be set by the host, in the Domain Registrar settings at Edit Registrar > Manage TLDs. - Lock Status: Domain names can be locked to protect against unauthorized, unwanted or accidental changes. The registrar may put a ‘Registrar-Lock’ on a domain. If a Registrar-Lock is on, the domain cannot be transferred to another registrar. Through the Marketplace the customer can lock or unlock a domain.
- Auth Code: An auth code also known as a transfer code is a code created by a registrar to help identify the domain name holder of a domain name. It is required for a domain holder to transfer a domain name from one registrar to another. Through the Marketplace the customer can reset auth code for its domain.
- Nameservers: These fields specify the nameservers being used by the customer. The customer can specify upto four nameservers.
- Contacts: Typically there are four types of contacts for a domain. They are as follows:
- Registrant: The registrant is the official owner and the highest authority for a domain name. It can be an actual person or an organization.
- Administrative Contact: The administrative contact is the registrant’s appointed agent for the domain name. In case the registrant is a company, the administrative contact should be an employee of the company. The administrative contact has full authority, almost equal to that of the registrant, over the domain name therefore the registrant should take special care in selecting an administrative contact. This contact has full authority to request and authorize any necessary decisions and updates on behalf of the registrant, including contact information, name server information and transferring ownership.
- Technical Contact: The technical contact is the person responsible for the technical administration of the domain name such as maintaining the nameservers associated with the domain name and attending to the technical administration of the domain files on the server. The technical contact does not have the authority to transfer ownership or administrative rights of the domain.
- Billing Contact: The billing contact is the person responsible for paying registration and renewal fees for the domain name.
- Registrant: The registrant is the official owner and the highest authority for a domain name. It can be an actual person or an organization.
While registering a domain, a contact can be selected from a drop down list, for each of the four types or a new contact can be created. Only those contacts will be available in the drop down list that have been assigned to the customer by the host.
Default Nameservers
While registering a domain, a customer can either use its own nameservers such as ns1.owndomain.com and ns2.owndomain.com or use the nameservers of its web hosting company. A customer’s own name servers are known as private nameservers. No matter which nameservers the customer uses, they can be defined here. They will be treated as the default nameservers for the customer.
View Transferred Domains
This section displays the domains transferred from a previous registrar to the current one, used by the customer.
- Delete: Click Delete to remove the transferred domain.
View Invoices
This section show all the invoices of this specific customer.
View Receipts
This section show all the receipts of this specific customer.
Update General Profile
Once you are logged on, navigate to the drop-down menu at top right corner and click General Profile. Modify information as required and update customer's profile.
Change Password
Once you are logged on, navigate to the drop-down menu at top right corner and click Change Password. Modify password as required and update customer's password.
Enable 2FA
Once you are logged on, navigate to the drop-down menu at top right corner and click Enable 2FA. Select Yes check box and OTP Delivery Mode from the drop-down list box.
Domain Registration
Customers can register internet domains through the Marketplace. They can search a domain and if its available they can register it through the Marketplace. To register domain, click Domain Registration and then type domain name in the search field.
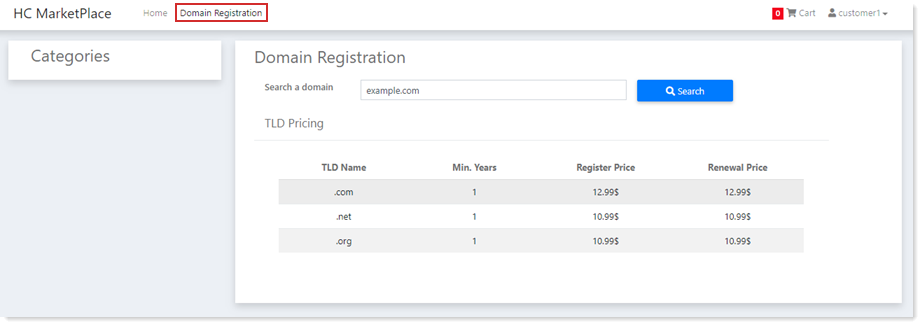
The customer can search a domain name and register it online through the Marketplace. For registering a domain name, the customer needs to login to its account. The registration process involves the following steps:
- Login to Account
Login to your customer account.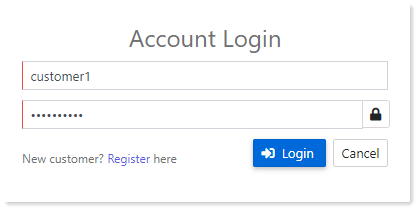
- Search Domain
Search your required domain. If the domain is available, marketplace will display an appropriate message.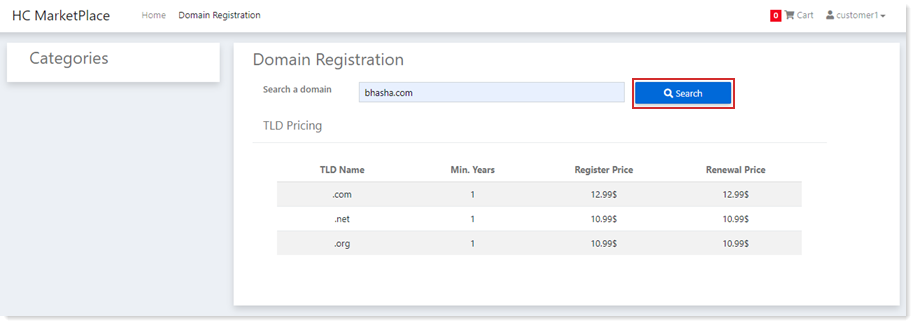
- Add to Cart
Add the domain to your shopping cart.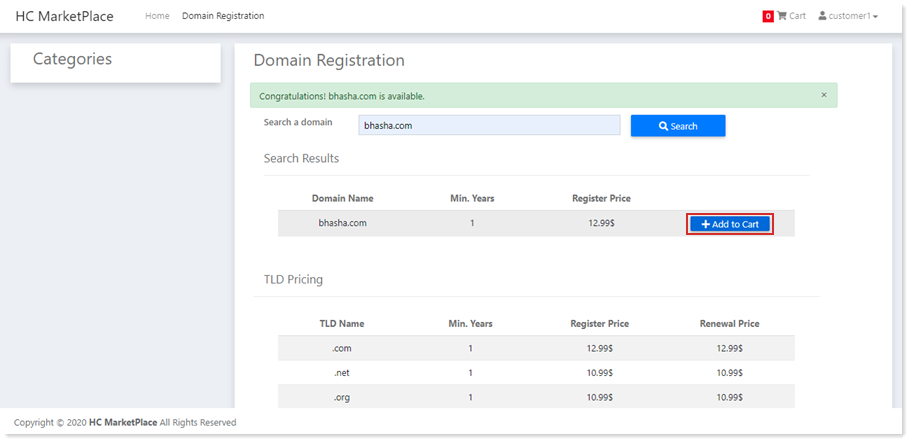
- Review Order
Review your order. Apply any discount coupon that may be available.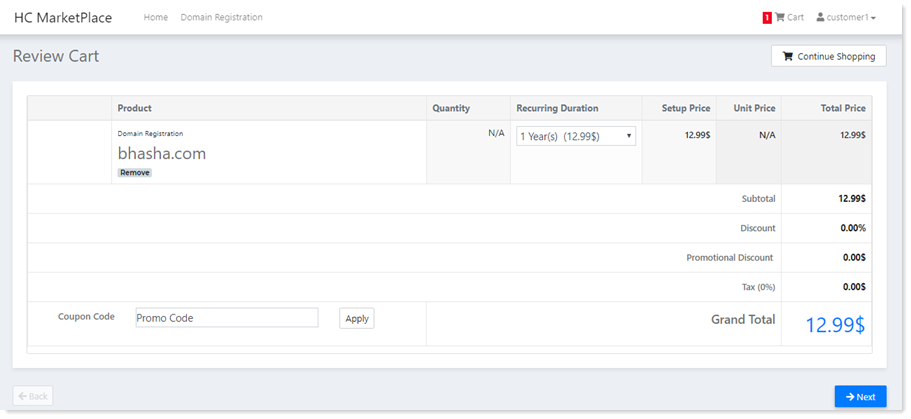
- Specify Payment Details
Fill in credit card number, expiry date and other payment details.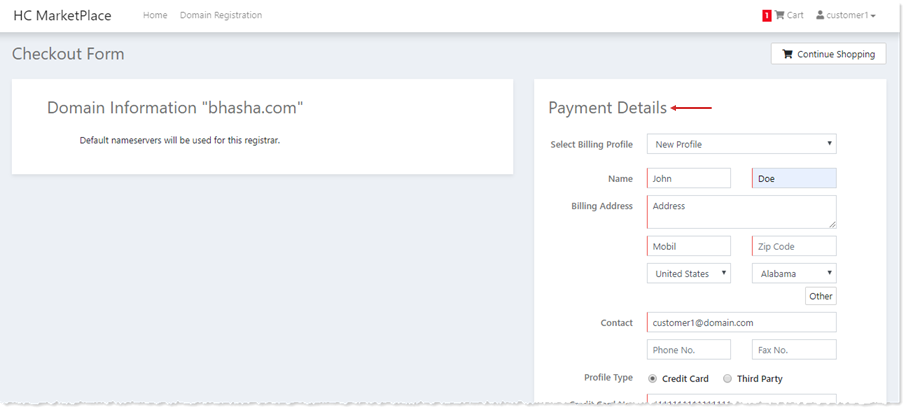
- Agree to Terms
Agree to terms of service by selecting the TOS check box at the bottom.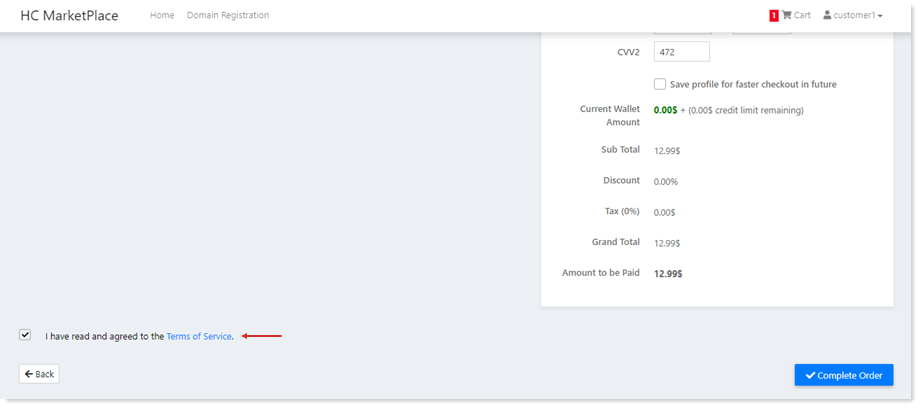
- Checkout
Checkout by hitting the “complete order” button. The next step displays an order summary. View the summary of your order or go back to the products page to continue shopping.