
| Product Documentation
ExSign
Adding and Managing Banners for Cloud Signatures
Banners are images shown below signatures for campaigns, offers, or announcements. You can schedule a start and expiry time, so banners appear and disappear automatically.
Open Banners
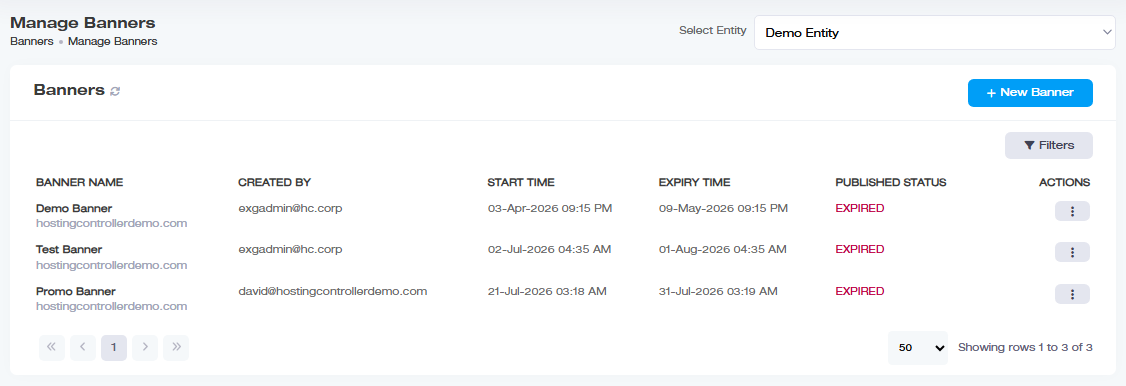
- Sign in to the ExSign Portal.
- In the left menu, under Main, click Banners.
What the Banners List Shows
| Field | Meaning |
| Banner Name | Name of the banner |
| Created By | User who created the banner |
| Start Time | When the banner begins appearing |
| Expiry Time | When the banner stops appearing |
| Published Status |
Published, unpublished, or expired |
| Actions |
Copy, edit, delete, and related actions |
Create a Banner
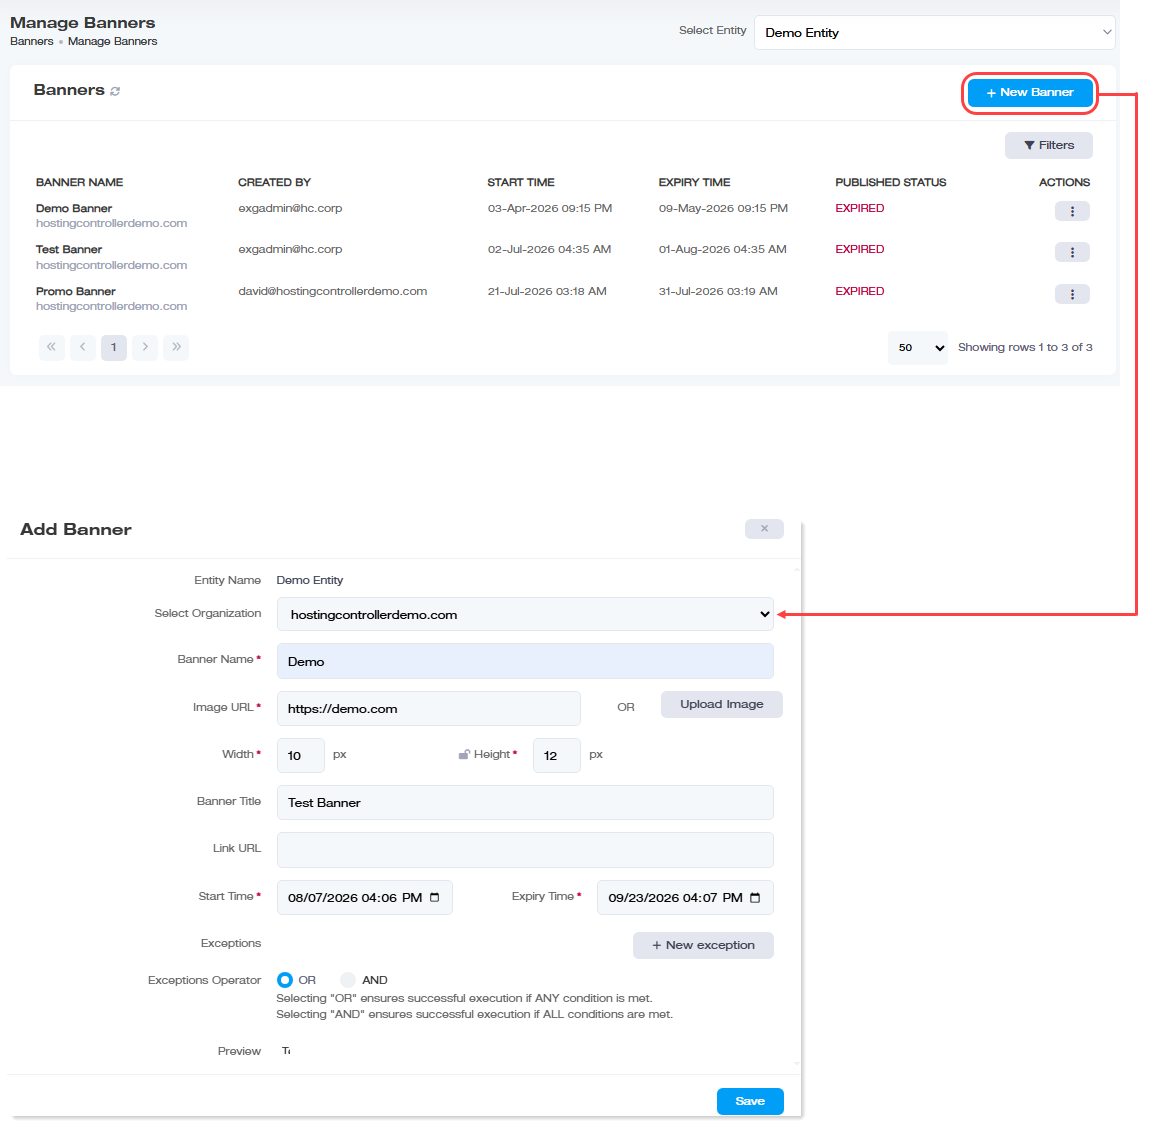
- Click + New Banner.
- Enter:
Field What to Enter Select Organization Microsoft 365 or Google Workspace organization Banner Name Friendly name Image URL URL of the banner image, and/or Upload Image Upload an image file Width / Height Size in pixels Banner Title Hover/title text in email clients - Optionally add Exceptions so the banner is skipped for specific senders, subjects, or other matching fields.
- Use Preview to review the banner.
- Save.
Expired banners cannot be published, unpublished, or edited.
Publish a Banner
A new banner stays unpublished until you publish it. Publishing is typically limited to ExSign Admin / higher admin roles.
- Open the banner actions.
- Publish the banner.
Edit/Copy a Banner
- Edit - change banner details, then save and republish if needed.
- Make a Copy - clone a banner and adjust schedule or image for a new campaign.
- Delete - remove a banner you no longer need.