
| Product Documentation
ExSign
Quick Start Guide
After installing all ExSign components on their respective machines, it is time to quickly set up ExSign for first-time use. Follow the steps below for a successful setup.
1) Add an AD User to the ExSign Admin Security Group
To login to the ExSign Portal for the first time, an AD user is required to be added in the ExSign Admin’s AD security group (The group name specified during the Portal installation).
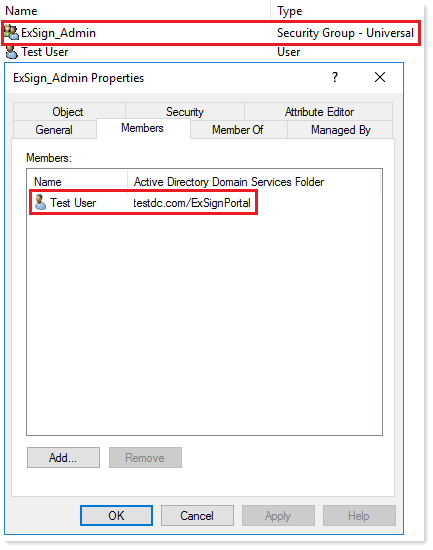
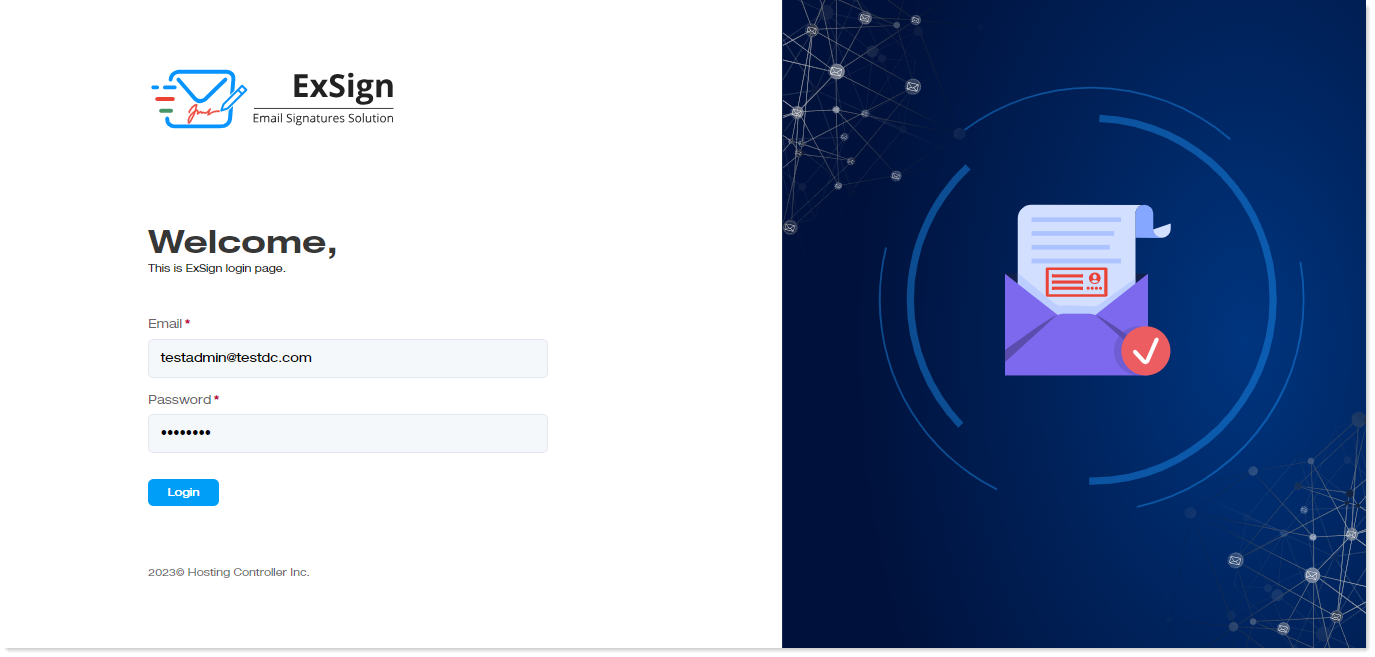
After adding the user into the group, use its UPN (User Principal Name) and password to log in to the Portal.
2) Update the Portal and Hub Server URL
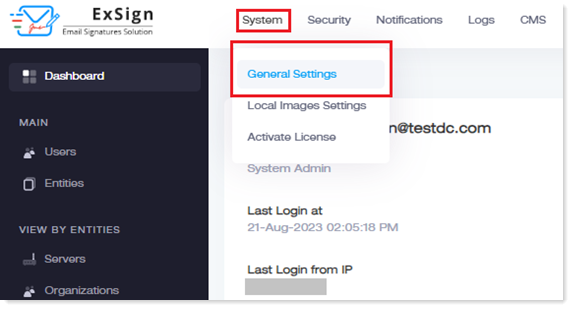
The very next step must be configuring the Portal and Hub server URL. Go to System >> General Settings.
Then, modify the values of Portal URL and Hub Server Access. Either use domain names or IP addresses. Although it is recommended to use domain names with SSL, however, while evaluation of the product, IP addresses can be used.
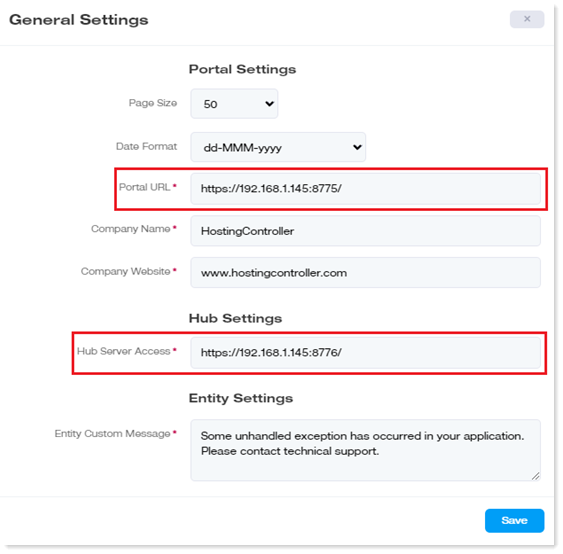
The mentioned URL fields are used for the following purposes:
- Portal URL: It is used only to access the ExSign Portal URL.
- Hub Server Access URL: It is used for communication between ExSign Agent and ExSign Hub/Portal server. This URL must be resolvable from the Agent machine.
3) Adding an Exchange Server Platform
Now, it is time to add an Exchange server platform on the ExSign Portal. Each platform is referred to as Entity. To add an Exchange entity, select Entities tab located at the left side of the Portal’s GUI.
After navigating to the Entities tab, click on + New Entity button.
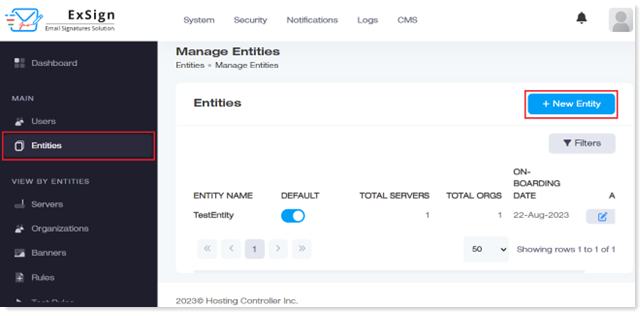
After that, enter the required details for the entity, and click on the Save button.
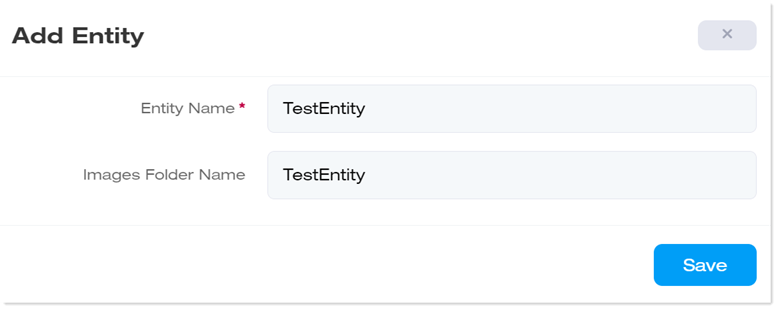
- Entity Name: You can insert any user friendly name for representing the Exchange Server.
- Images Folder Name is the name of the custom folder within the ExSign Portal. It is optional to use. However, if required, then insert the desired value in the textbox.
4) Activate the License
If the License has already been purchased, then use the key provided after license purchase to activate the product (i.e., ExSign Portal).
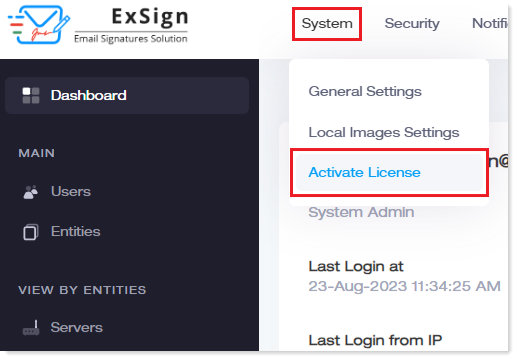
After that, allocate license quantity to the Exchange entity.
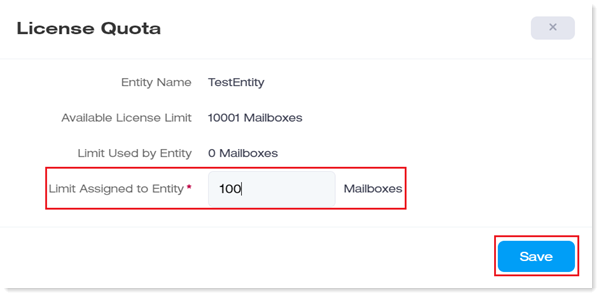
If the license has not been purchased yet, then this step is to be ignored. It is to be noted that the ExSign Portal, upon first-time use, is running in evaluation mode. This mode allows to test email stamping on two email accounts.
5) Connect Exchange MBX Servers
Now it is time to add an Exchange mailbox server on the ExSign Portal. Navigate to the Servers tab as shown in the figure below.
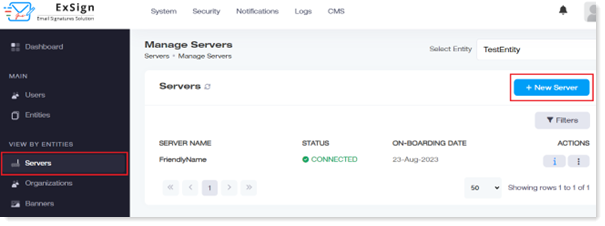
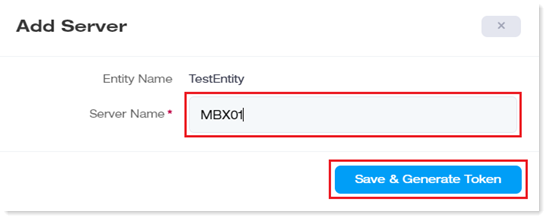
Then, click on +New Server button and enter a friendly name for the server. After that, click on the Save & Generate token button.
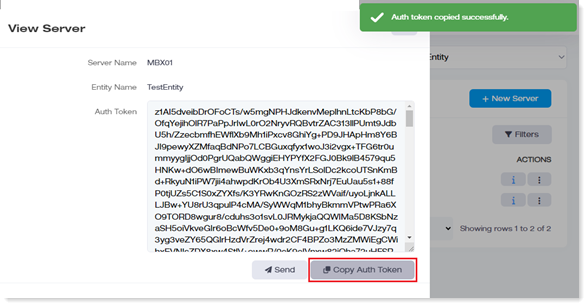
Copy the token from the Portal.
Then, insert the token on the ExSign Agent and add the Exchange DC.
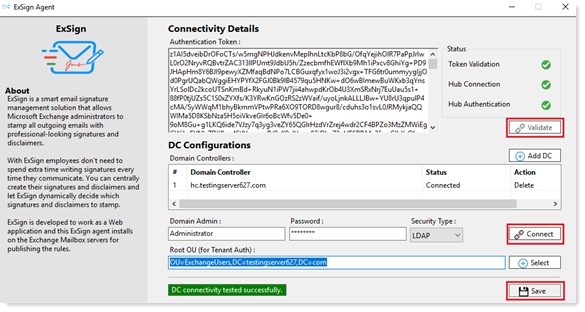
After successful connection, the Portal will indicate that the added Exchange server is connected.
- Root OU: This path is used only to store OU admin authentication security groups.
6) Add an Organization
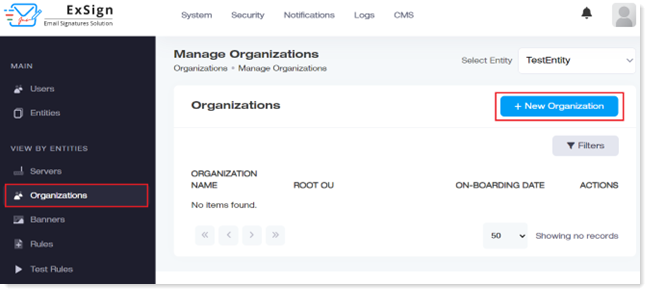
Now, add the organization on which the ExSign system will stamp signatures and disclaimers. Navigate to the Organizations tab, and from there, click on the + New Organization button.
Then, insert either a user-friendly name or the exact OU name in the Organization Name textbox. Select the target OU. After the selection is complete, click on the Save button.
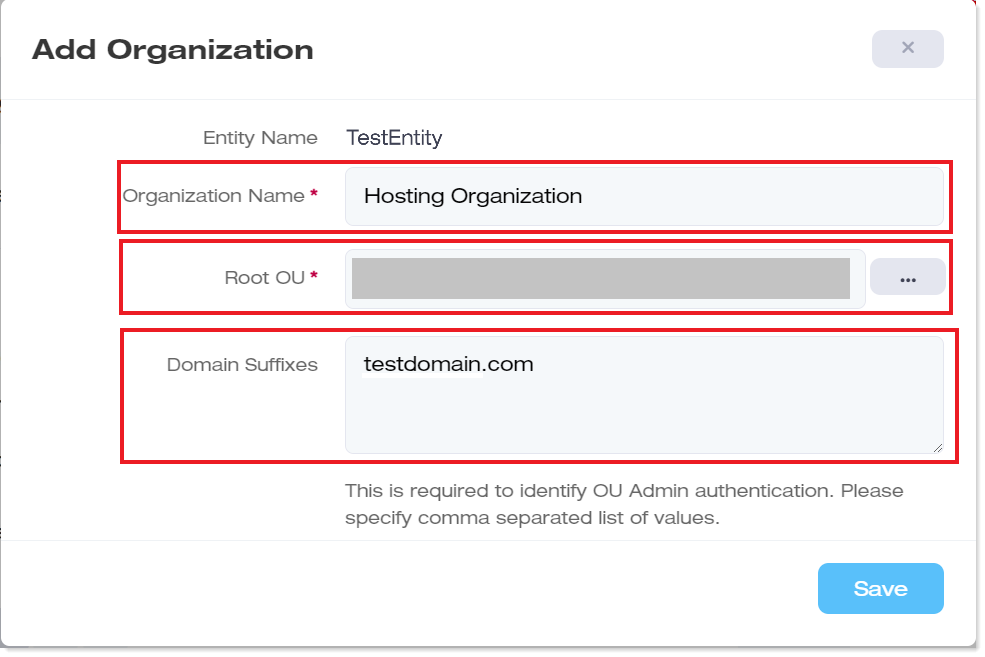
- Domain Suffix: This is used only if you allow OU Admin to access the Portal. You must not insert the UPN suffix for the Portal administrator accounts.
7) Add a Signature Rule
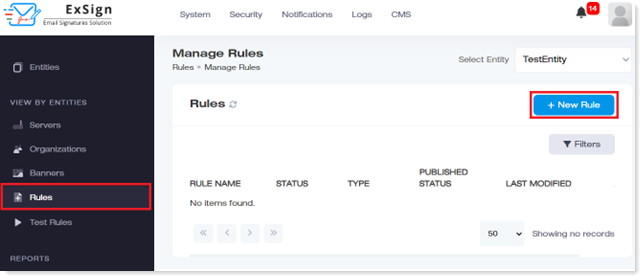
The final step is to add a signature rule. Go to the Rules tab and then, click on the + New Rule button.
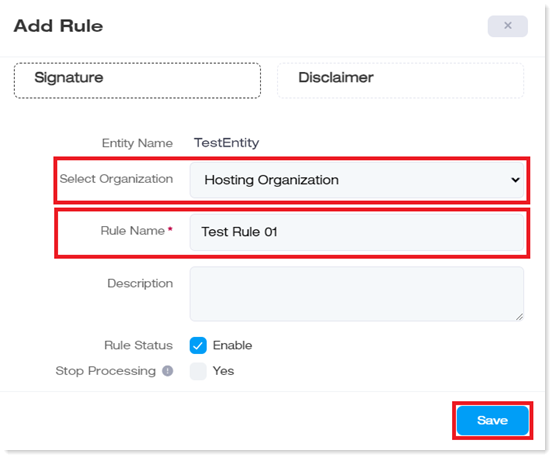
A prompt window titled Add Rule opens after clicking on the + New Rule button. Select whether the rule will be used to stamp signature or disclaimer. Select the organization to which the rule will be applied. Also specify the name of the rule. If required, input the description of the rule (i.e., what the rule is meant to accomplish). Check the Rule Status box to enable the rule. If the processing of further rules is meant to be disabled, then check the Stop Processing box.
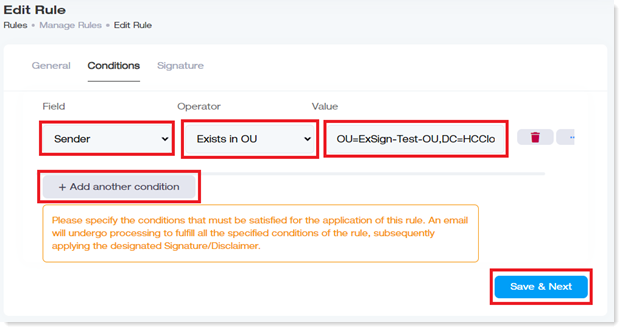
Then, set conditions upon which the rule will be applied.
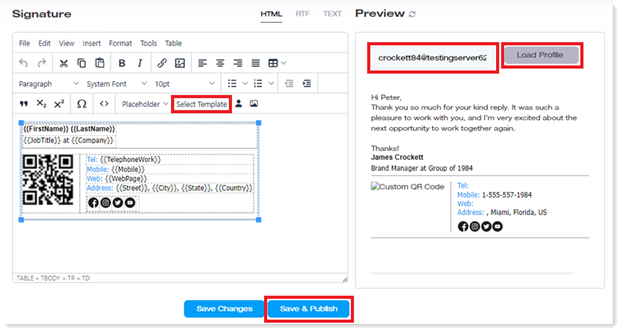
Then, select the template (for either signature or disclaimer, depending on the selection of the type of rule) to be used. After selecting the preferred template, test how the template would look like. On the right side of the GUI as shown in the figure below, there is a Preview pane which allows to check how the stamped signature or disclaimer will look like with a specific mailbox user’s credentials. Enter the profile on which the rule is to be previewed, and then click on the Load Profile button. After completing this task, click on the Save & Publish button to both save and publish the rule.
8) Test the Rule
Now, it is time to test the rule. For verifying this, send an email using any device or platform such as Outlook, OWA, iOS, Android, etc.